1. Understanding WordPress: (WordPress Blog)
(WordPress Blog):- Before we go into understanding what WordPress is all about, I would like us to keep in mind that the best step to follow when about to start your online pursuit through blogging is to, first of all, assemble and write your articles after you must have ascertained what your niche is all about.
I advise you to write at least eight articles set aside before delving into your blog creation.
Assuming you have done that already, let us now delve into the introduction of WordPress.
i). Introduction to WordPress as a popular content management system (CMS):-
WordPress is a popular content management system (CMS) that helps individuals and organizations to create websites with ease.
With its robust tools, there are not many technical skills required to set up a website with WordPress.
It was originally known as a blogging platform that over time evolved into a versatile CMS capable of handling various types of websites, including blogs, business websites, e-commerce platforms, portfolios, and more.
Now, I think is good to look into the five major benefits of using WordPress for blogging.
ii). 5 Major Benefits of using WordPress for blogging:–
There have been several benefits of using WordPress as a content management system which contributed to its popularity among users and the five major benefits are listed below:
— User-Friendly Interface:- WordPress has made it possible for both beginners and professionals to create their apps without hassles with their well-structured easy-to-use user interface.
— Customization Options:- WordPress offers a wide range of options ranging from themes, plugins, and templates which allows users to customize the look and feel of their blogs.
— Plugin Support:- The vast range of plugins available in the WordPress plugin directory allows users to add various functionalities to their blogs without prior coding experience.
— Search Engine Optimization (SEO):- Users can easily optimize their content for search engine ranking due to the fact that WordPress comes equipped with SEO-friendly features.
— Regular Updates and Security:- The WordPress team consistently releases updates that improve security, fix bugs, and enhance features. This commitment to maintaining the platform’s integrity ensures that bloggers can run their sites securely and efficiently.
Having reeled out the five major benefits of using WordPress, let’s go into the practical settings but first of all starting from the foundation set-up.
2. Setting Up the Foundation:
i). Choosing between WordPress.com and WordPress.org (The Difference):-
WordPress.com and WordPress.org are two distinct platforms that offer website building and content management capabilities using WordPress software. They cater to different needs and have various features. Here’s a breakdown of the differences between the two:
WordPress.com:
— Hosted Platform: WordPress.com is a fully hosted platform. This means that your website will be hosted on WordPress.com’s servers, and you don’t need to worry about finding separate hosting.
— Ease of Use: It’s designed for beginners and requires minimal technical knowledge. The setup process is straightforward, and you can start building your website quickly.
— Limited Customization: While WordPress.com does offer a variety of themes and customization options, the level of customization is limited compared to WordPress.org. You can’t install custom themes or plugins unless you’re on a higher-tier plan.
— Pricing Tiers: WordPress.com offers different pricing tiers, including a free plan with limited features, as well as paid plans with more advanced features and customization options.
— Domain Names: With the free plan, your domain name will include “wordpress.com” (e.g., yoursite.wordpress.com). Paid plans allow you to use a custom domain name (e.g., yoursite.com).
— Monetization and Ads: Monetization options, including running ads, are limited to lower-tier plans. Some higher-tier plans allow for more monetization options.
— Maintenance and Updates: WordPress.com takes care of updates, backups, and security for you, so you don’t have to worry about those technical aspects.
WordPress.org (Self-Hosted WordPress):
— Self-Hosting: With WordPress.org, you need to find your own web hosting. You have full control over your website and can choose any hosting provider that supports WordPress.
— Complete Control: You can install custom themes, and plugins, and make deep customizations to your website’s code. This level of control is ideal for those who want a highly personalized website.
— Unlimited Customization: You can create and upload your own themes, use third-party themes, and customize them extensively.
— Plugins: You can install any WordPress plugin, which allows you to add a wide range of functionalities to your website, from e-commerce to SEO tools and more.
— Monetization and Ads: You have complete control over monetization. You can run ads, use affiliate marketing, sell products, and explore various revenue streams without limitations.
— Responsibility for Maintenance: You are responsible for managing updates, backups, security, and other technical aspects of your website. This requires more technical knowledge or the willingness to learn.
In summary, the choice between WordPress.com and WordPress.org depends on your needs and level of expertise:
Choose WordPress.com if you want an easy-to-use platform, with minimal technical hassle, and doesn’t require extensive customization. This is suitable for personal blogs or simple websites.
Choose WordPress.org if you want full control, unlimited customization options, the ability to install any plugin, and the potential for advanced monetization. This is ideal for businesses, online stores, and individuals who want a unique online presence.
Remember that your choice can be influenced by factors like your budget, technical skills, long-term goals, and the specific features you need for your website.
ii). Selecting a domain name and hosting provider:–
A domain name is the name of your business, that name of your choice, and hosting are computer servers connected to around the Globe that will enable you to have your name hosted and be able to be searched around the Globe.
There are many Domain and Hosting service rendering companies around but I will advise you to use Namecheap because I have used them for more than thirteen years now and have not experienced any setbacks.
To learn how to buy a domain name from Namecheap, and hosting space and enable Nameserver from basic to web. Follow this link:
Buy a domain name and hosting space from any domain and hosting company (I suggest Namecheap).
iii). Installing WordPress on your hosting server:-
Just like I mentioned above hosting are computer servers connected to around the Globe that will enable you to have your name hosted and be able to be searched around the Globe.
So, you need a hosting server to rest your website files on. This will enable individuals to search your name and be able to reach your website around the globe.
For vivid and practical knowledge on how to install WordPress (CMS) on your hosting server follow this link: INSTALLING WORDPRESS ON YOUR DOMAIN
Now let’s head to the nitty-gritty of how you can customize your blog.
3. Customizing Your Blog:
i) Setting of WordPress Dashboard:-
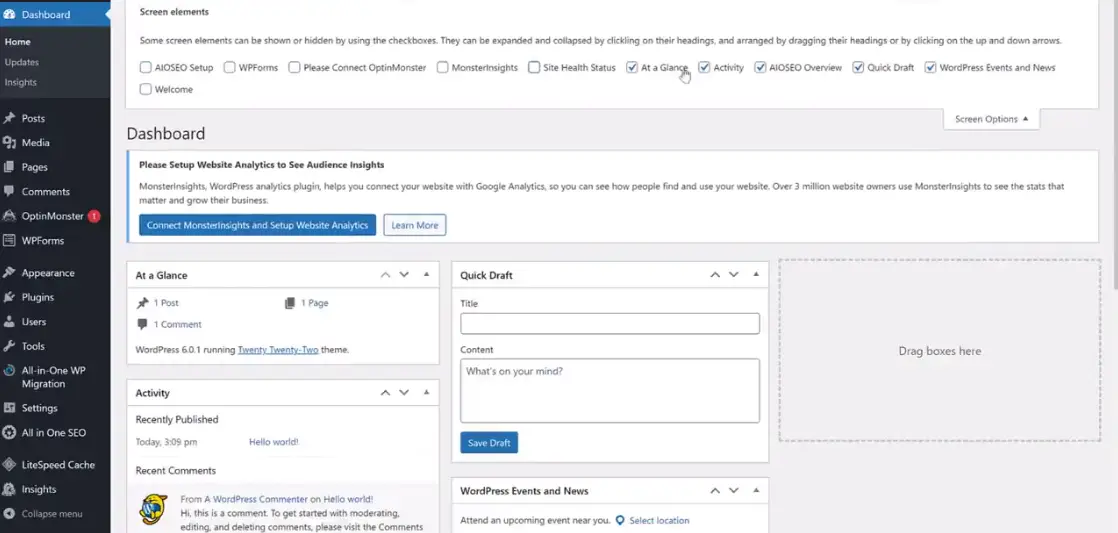
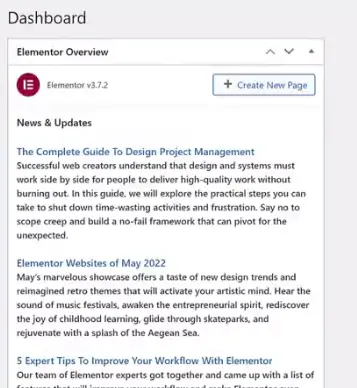
To set up your WordPress dashboard for proper work analysis, this is what you have to do. After installing WordPress on your domain and logging in, your WordPress dashboard will look like this.
At the extreme right-hand side of the page at the top click on the option known as “screen option” Click on it to display the options and untick the check buttons to clear up the dashboard. Image description below:
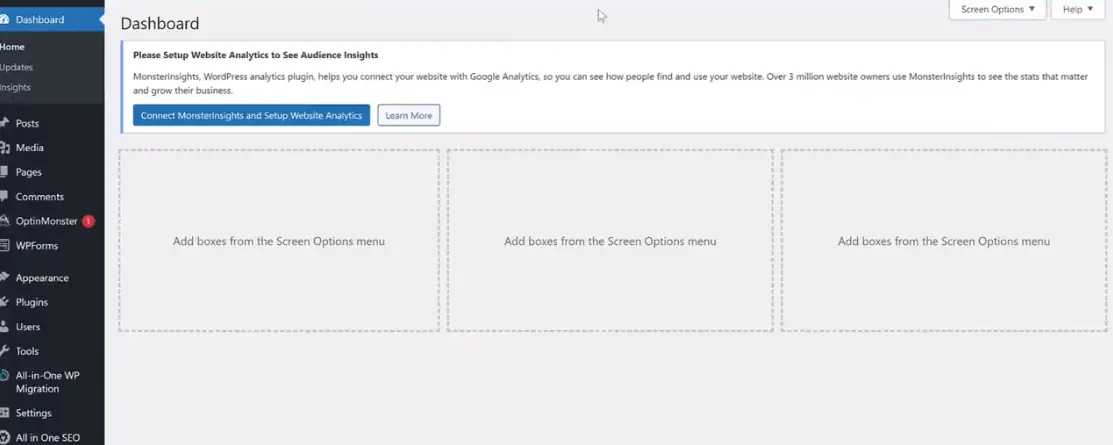
Then the whole dashboard will be cleared and it will be plugin-free. Image of the clean dashboard below:
Let’s examine some of the main menu options on the left-hand side:
POSTS MENU OPTIONS:- Go to the top-left-hand side and click on “Posts” This is where you will be able to post the blog content. Currently, there is a default post with “Hellow world” and you can delete it by hovering on the post and clicking “delete” to delete the content. Image description below:

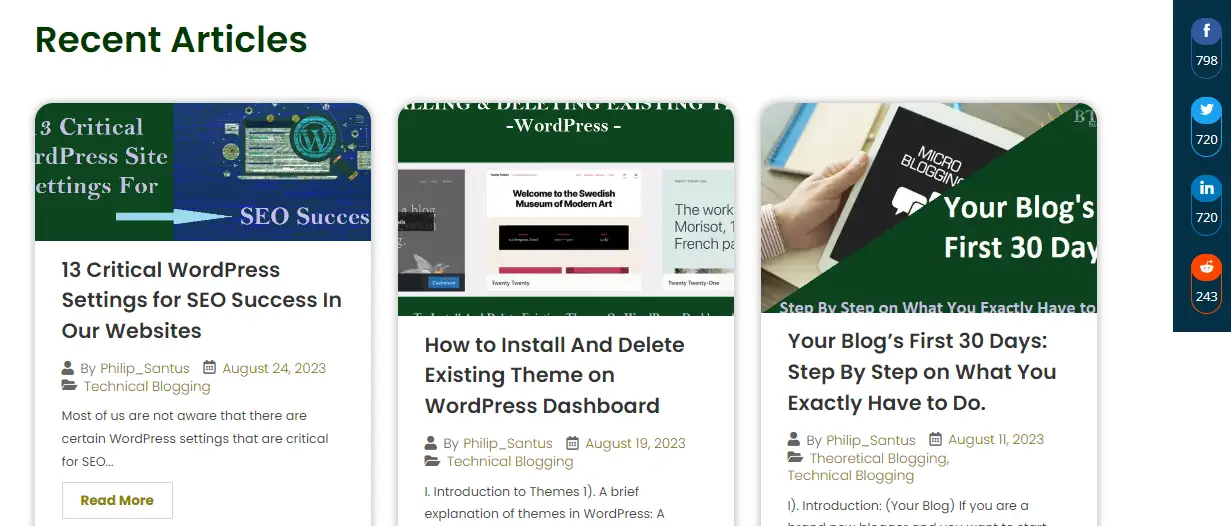
This “Post Option” is what we will be using to create blog posts just like the image below:
MEDIA MENU OPTIONS:- This is where you can be able to upload media files like pictures, audio, videos, and PFD files and be able to manage them. Image description below:

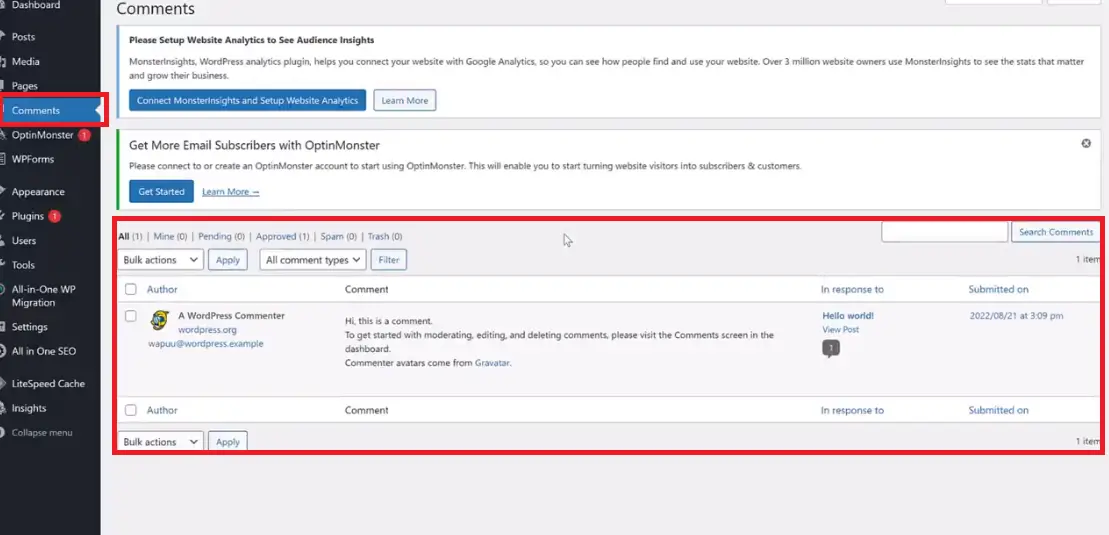
COMMENT MENU OPTIONS:- This is where we can be able to moderate all the comments dropped on our website by the visitors. Here you can approve, spam, delete, and see pending comments for approval. Image description below:
APPEARANCE MENU OPTION:- This is where you will be able to see the “Themes” A theme is what changes your website design and appearance. To know more about how to delete an existing theme and install a new third-party theme follow this link: How to Install And Delete Existing Theme on WordPress Dashboard
Image description below:
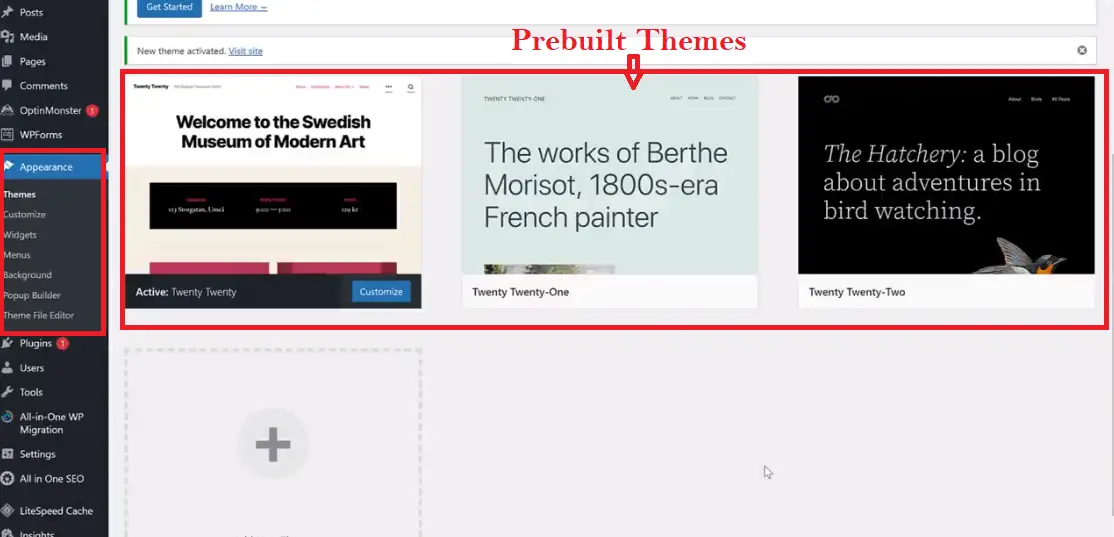
PLUGINS MENU OPTIONS:- A theme is what enhances your website appearance and design. Then what is a plugin? A plugin is a piece of software and add-ons that adds features and functionalities to your website.
And you have to delete all the plugins which are by default and install your own plugins. To know more about how to install and delete plugins on the WordPress dashboard follow this link: How to Install a WordPress Plugin (Beginner’s Guide)
Image description below:
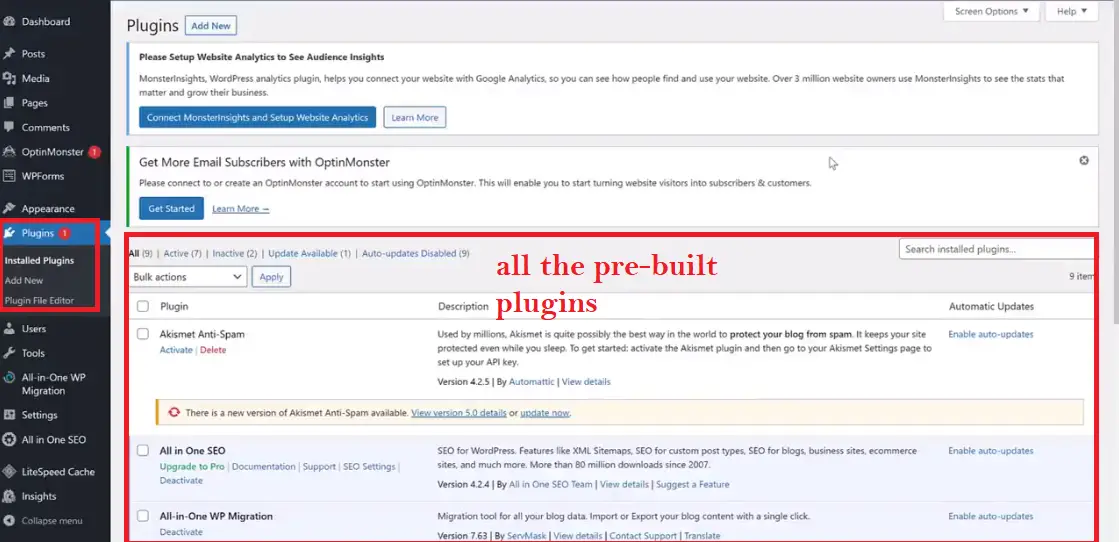
While deleting all the pre-built plugins you have to leave the one called “Light Speed Cache” This is the plugin that will help your website speed while loading on any browser. Do not delete it.
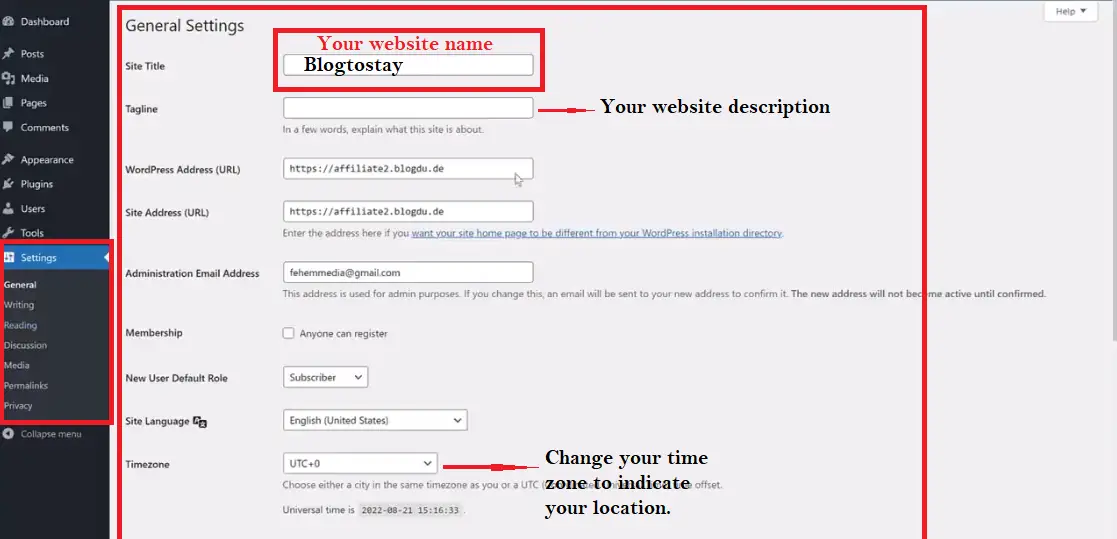
SETTINGS MENU OPTIONS:- This is where you can do the majority of your website settings. After the settings click on “save changes” at the bottom. Use the settings on the image attached. Image description below:
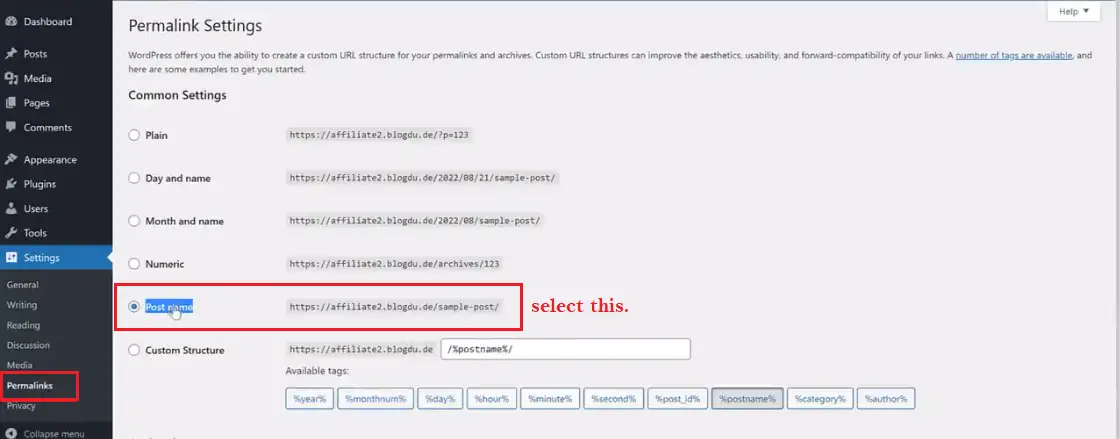
PERMALINKS SUB-MENU OPTIONS(Under SETTINGS):- Under the sub-menu drop-down of the “SETTINGS” click on “Permalinks” This is where to configure the permalink structure for your URL which is essential for SEO management. This is the most friendly SEO permalink structure.
And I recommend you select the permalink structure called “Post name” for SEO improvement. Click on the check button to highlight it. After that, scroll down and click on “Save Changes”. Image description below:
To learn more about critical WordPress settings for SEO follow this link: 13 Critical WordPress Settings for SEO Success In Our Websites
With this, we have completed all the settings on our dashboard related to our website. Now we will be installing THEMES AND PLUGINS.
ii) Installing Themes and Plugins:
PLUGINS:–
The first plugin we will be installing is the Elementor page builder. This will enable us to create different web pages and a whole lot more.
To know more about Elementor page builder follow this link: WHAT IS ELEMENTOR PAGE BUILDER IN WORDPRESS?
To go into details about the best three-page builders follow this link: THE BEST 3-PAGE BUILDERS TO USE IN WordPress.
If you don’t want to go into details now concerning the Elementor page builder, you can go ahead and continue with the tutorial. Follow this link and come back to continue here, this is to enable you to learn how to install, activate, and delete plugins: How to Install a WordPress Plugin (Beginner’s Guide)
Below is the list of plugins you will install and activate to enable you to complete this website project:
a). Elementor Page Builder. Image description below:
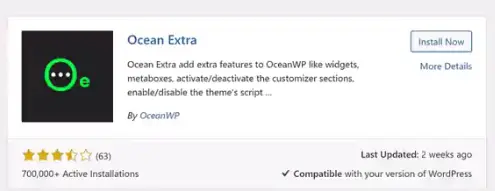
b). Oceanwp: Download the following under oceans and they are:
— Ocean Extra. Image description below:
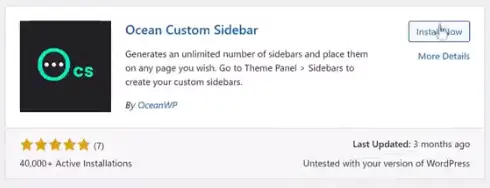
— Ocean Custom Sidebar. Image description below:
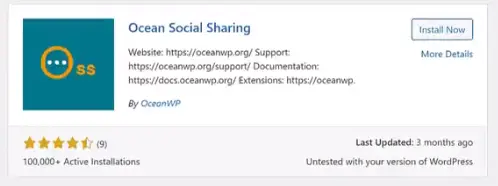
— Ocean Social Sharing. (These plugins will add some extra features to your Oceanwp Themes). Image description below:
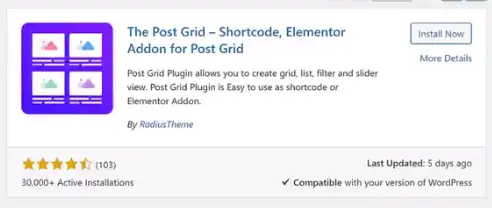
c). Post Grid. (allow you to create grid, list, filter, and slider view). Image description below:
d). Kadence Blocks. ( Help you create custom blocks for Gutenberg to help extend the editing capabilities and create beautiful page blocks ). Image description below:

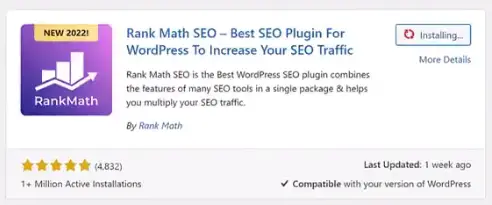
e). RankMath SEO. (Combines the features of many SEO tools in a single package and helps you multiply your SEO traffic). Image description below:
Remember to follow my plugin installation procedures to ACTIVATE your plugins. Also, try remembering to enable auto-updates.
INSTALLATION OF THEMES:–
You have to also install and activate a theme called Oceanwp. A theme helps in the website’s design and appearance. Follow this link and learn how to delete an existing theme and install a new one.
With the instructions as guided, install and activate “Oceanwp” for the purpose of this project. The link: How to Install And Delete Existing Theme on WordPress Dashboard
Image description below:

iii) Setting Up The RankMath SEO Plugins:-
Rank Math is one of the most powerful WordPress SEO tools you can use to optimize your website content.
RankMath SEO Plugin helps make WordPress SEO less hassle and more fun.
Then for this project, I will advise you to follow this link: Installing And Setting Up RankMath SEO Plugin, Using It To Optimize Content. (Practical Guide).
To know more about how to install and set up this plugin then, come back here to continue with this project. I wish you good luck.
iv) Creating Our First Blog Post:-
To do this click on “Posts” at the right-hand side top menu options, and remember to hover on the dummy blog post with “Hello world” as its title and delete it.
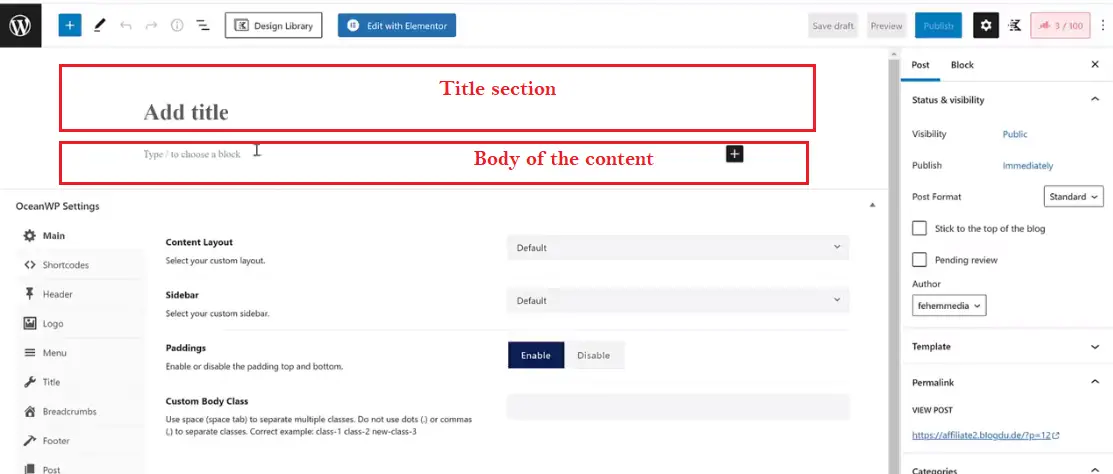
Then at the top page where you see Post with “Add New” click on it to take you to where you will be typing your content ready to post. Image description below:

The page will look like the image below:
In this blog post, we will talk about how to start your introduction, and how to use focus keywords throughout your content.
And all the different elements that you needed like the “Table of contents” where to use the H2 heading, where to use paragraphs, how to use internal and external links, and how to improve the SEO ranking for your media files.
Also how to create re-useable elements from Gutenberg blocks like Pros and Cons elements.
ENTERING YOUR TITLE CONTENT:—
First of all, you have to enter your “TITLE”. IMAGE DESCRIPTION BELOW:
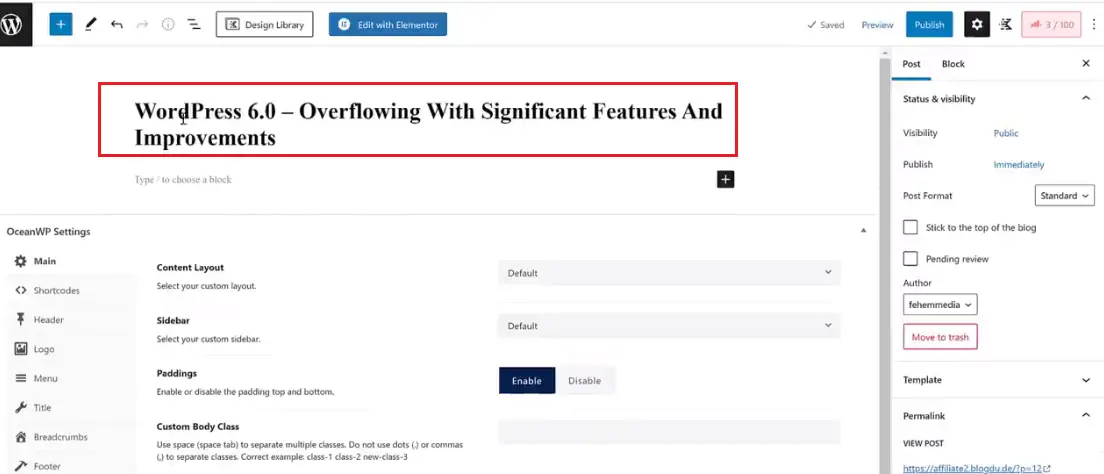
Make sure you make use of focus keywords when posting. In this sample, my focus keyword is “WordPress 6.0” Then if you go to the extreme right-hand side top corner you will see the red rectangular box with “8/100” as the percentage rank in SEO. This is due to the focus keyword used in the Title.
Then click on it to display the box for ranking, copy the keyword “WordPress 6.0” and paste it inside there, you will see that the ranking will increase to “45/100”. Image description below:

Focus Keyword is very important because it tells Google that this is the thing you are talking about. So, whenever somebody searches for something you might likely be among the list of things to be showcased as searched.
Very important that your focused keyword be present in the title.
ENTERING YOUR BODY CONTENT:—
To enter your blog’s body content, copy from where you saved it and paste it within the body section of the WordPress post page. And make sure your focused keyword is present in the introduction for proper SEO analysis. Image description below:
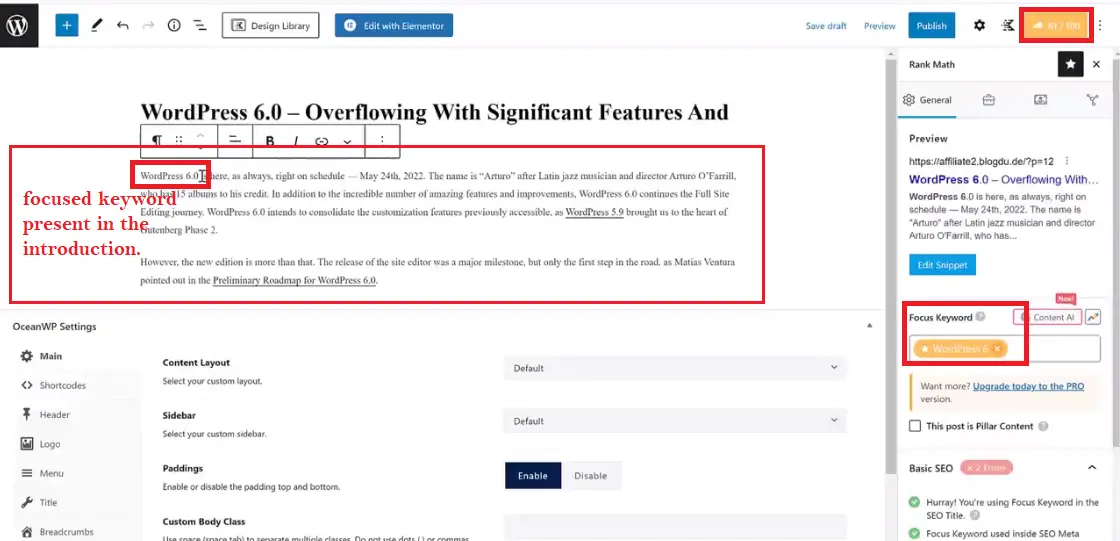
And don’t just use focused keywords anyhow you want them on the pages. Make sure that it makes sense while using it. As you can see at the top right-hand-side metric analysis, by merely starting this post the SEO ranking has increased to sixty-one.
This is because, we used it within the first line, second line, and as well at the third line within the sentences.
Do not create a paragraph of twenty lines or thirty lines, always make your paragraphs to be short and precise.
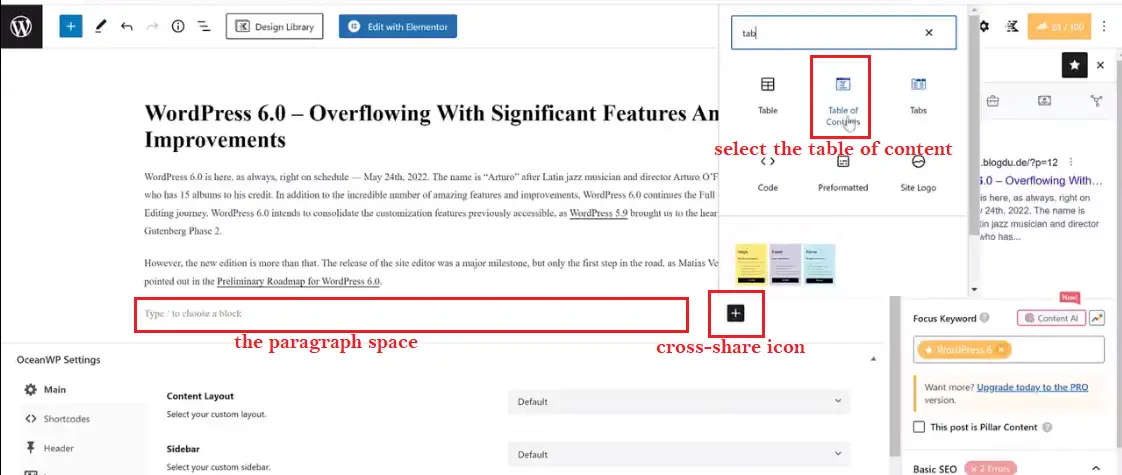
ADDING “Table of Content”:
Press ENTER on your keyboard to enter into a new paragraph, at the right-hand side within the paragraph click on the “cross-share icon.”
This is to display options for elements, then select and click on “Table of Content” to add it to your page. Image description below:
The TABLE OF CONTENT will be added and looks like the image below:
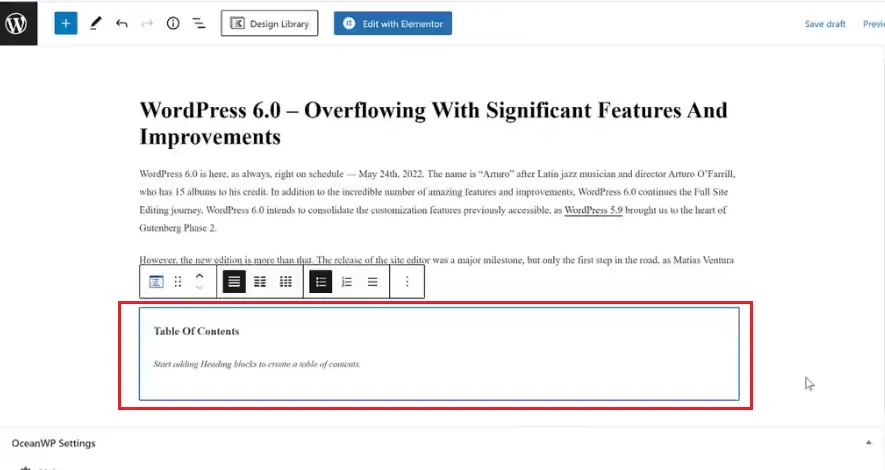
No heading added yet, so to do that, click on the table of contents to highlight it as indicated above in the image, then press “ENTER” on your keyboard to enter the next paragraph.
Like before on the right-hand side click on the cross-share icon and select “heading” to display various heading options. Image description below:
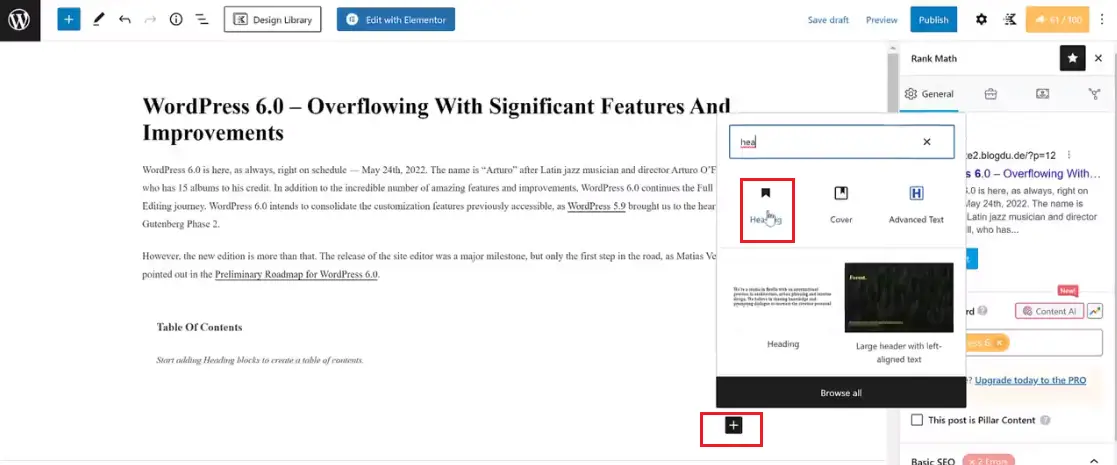
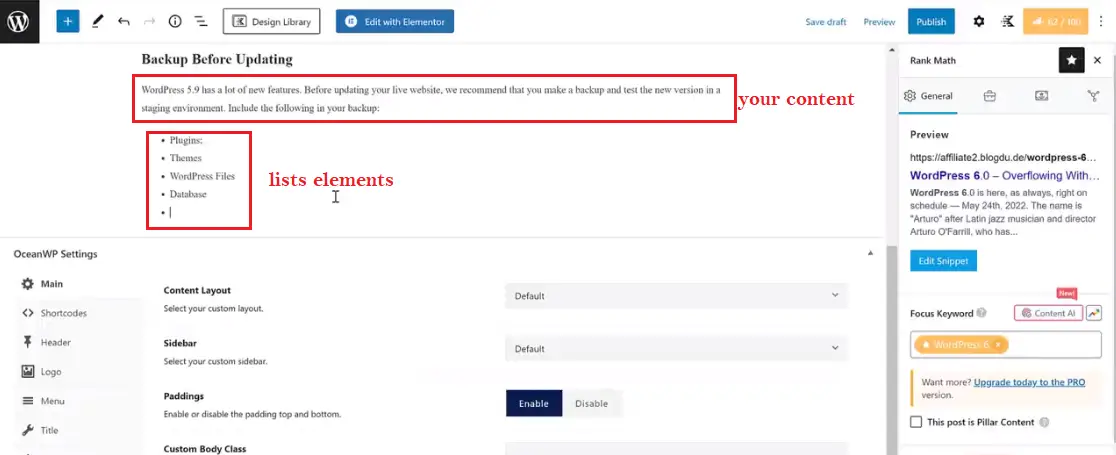
Enter your heading sentence. Where you see H2 is where to click and select other heading options example; H3, H4, H5, and H6. Image description below:

Then start adding the required texts, including list elements if you want to display lists of items. Image description below:
CREATING INTERNAL LINKS:
Highlight the particular words or phrases you want to hyperlink. Image description below:

Click on the “link icon” as indicated in the image above to display the URL. Copy your URL link and paste it into the form. Enable the option button that reads “open in new tab” and click the semi-circular arrow to add the link. Image description below:

The color of the highlighted words or phrases should change to blue or greener color depending on your universal color selection for links you made use of when designing your website.
OPTIMIZING YOUR CONTENT FOR SEO RANKING:
To further optimize this content, follow the link below as stipulated and learn how to do that.
OPTIMIZE CONTENT FOR SEO RANKING
HOW TO CREATE A CATEGORY FOR YOUR PARTICULAR ARTICLE PAGE:
By the right-hand side click on “post” scroll down locate “categories” click on “add new category” and type in the name of your category on the form bearing “New Category Name.”
Image description below:
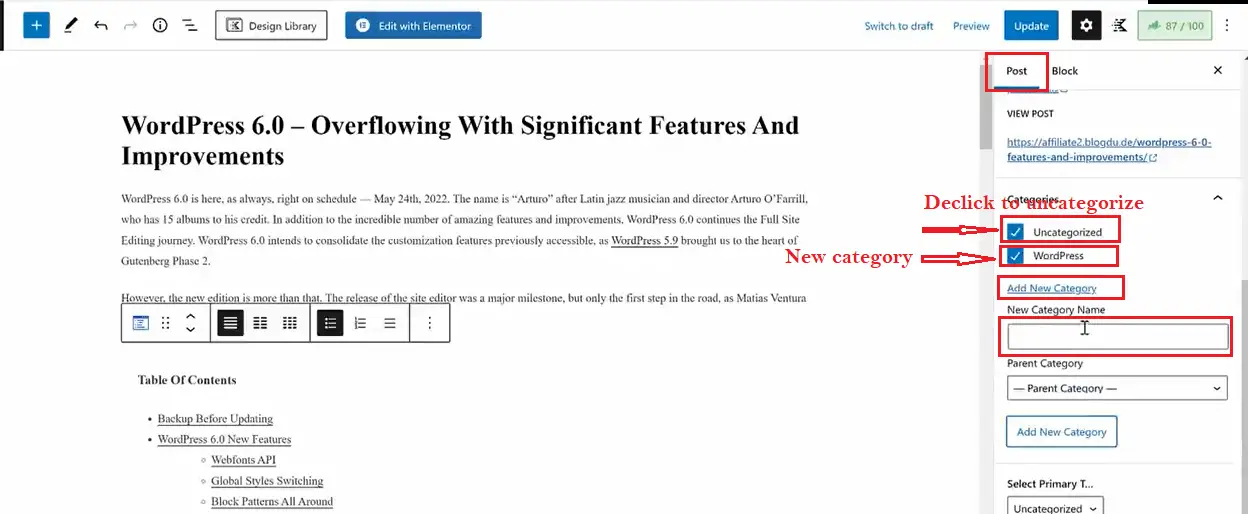
Untick “uncategorized” to declick the page from highlighting among uncategorized.
Henced finished click on “update” to save your blog post. With this, you have created your first blog post. Image description below:
HOW TO CREAT ELEMENTS LIKE THE IMAGE BELOW WITH Gutenberg Blocks IN YOUR BLOG POSTS:
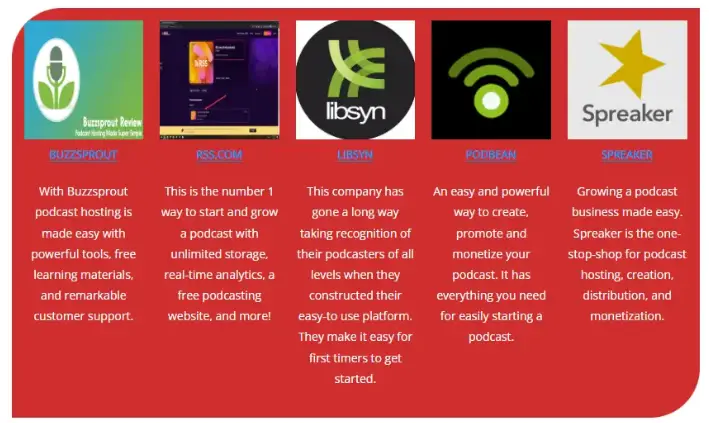
To learn how you can create similar elements for price listing, product display, and so on. Follow the link: HOW TO CREATE ELEMENTS WITHIN YOUR BLOG POST WITH GUTENBERG BLOCKS
4. CREATING AND DESIGNING YOUR BLOG’S (Home) PAGES:
At the left-hand side menu bar, click on “Pages” and click on “Add new.” Image description below:

Then enter the title of the page example “Home” scroll down select the option of ‘content layout’ and select ‘100% full width’. Image description below:

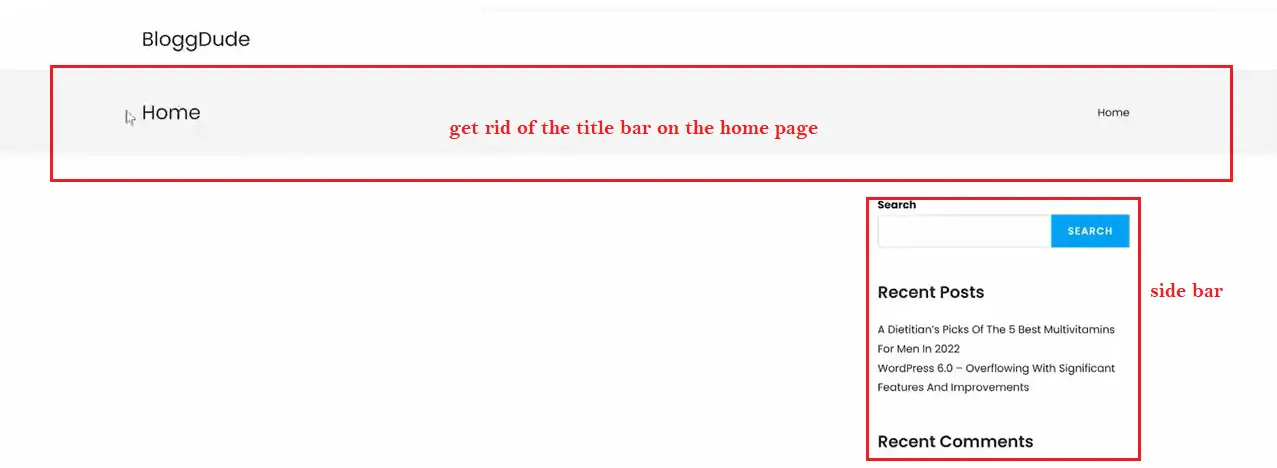
According to the image below, the home page does not have to have a title or sidebars so, we will now remove the title bar. Image description below:
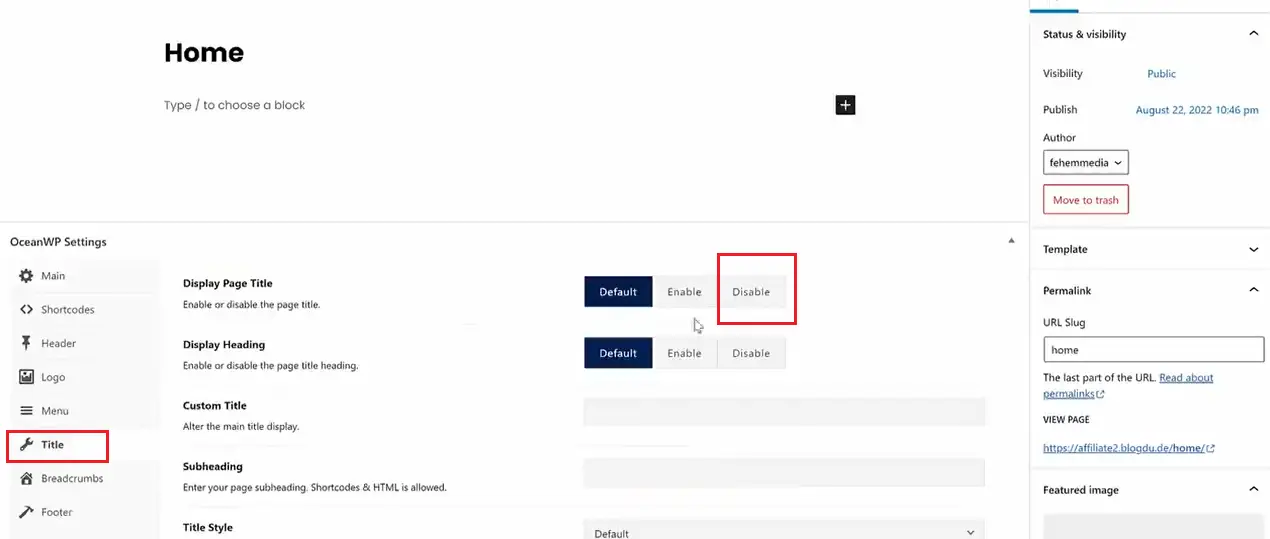
To do that click on “Title” on the left-hand side and on the right-hand side click on “Disable.” Image description below:
Then click ‘Update’ at the top-right-hand side to save and update the page.
Open your browser and type in your website URL to display the home page. You will get a blank page just like the image below:
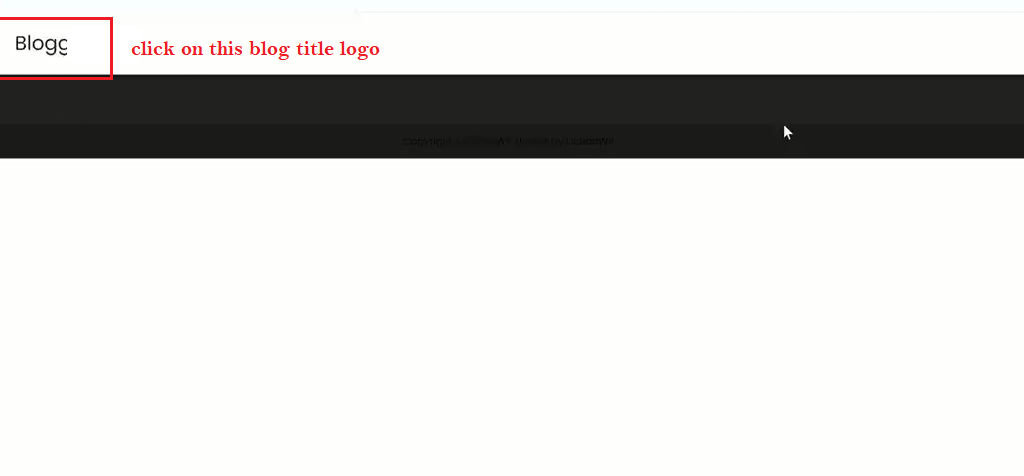
And if you click on the blog title logo, you will be redirected to another page. This is because this home page now serves as a regular page, to make it redirect to itself as the home page or to it when clicking from another page follow this step:
Remember, that you named it HOME when creating this page do not make it a home page. You have to set it as a home page.
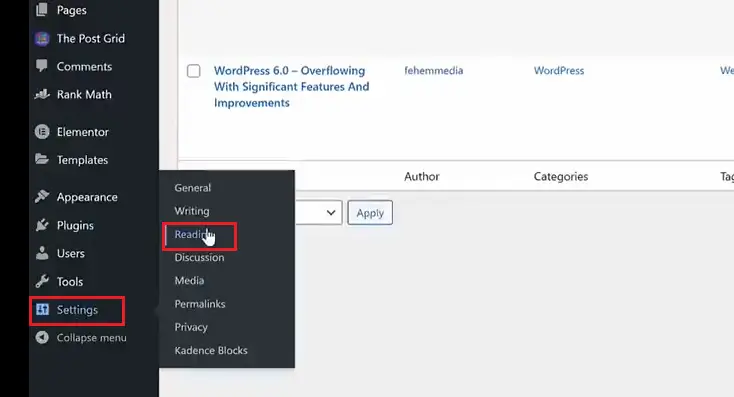
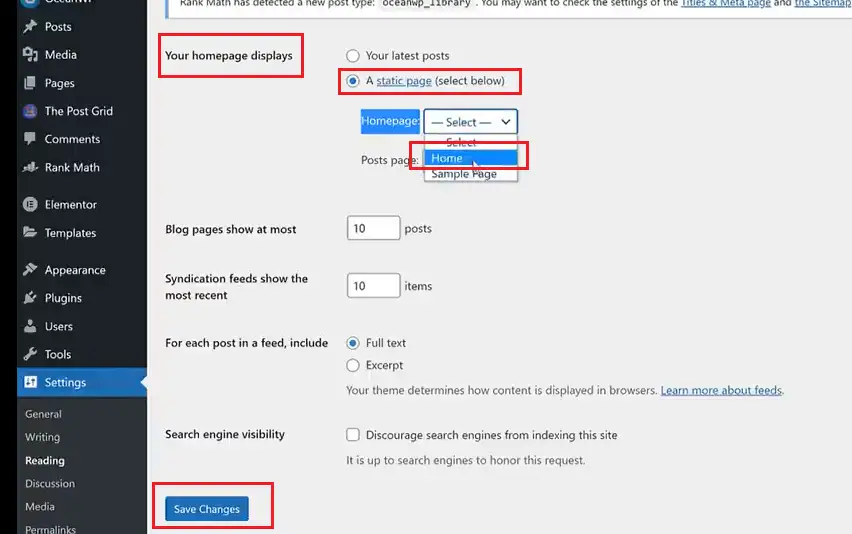
To do that go to the left-hand side main menu and hover on “setting” and click on “Reading.” Image description below:
On the option of your homepage display highlight the button “A static page (select below)”. On the dropdown menu of ‘Homepage’ select “Home” and click on “Save changes.” Image description below:
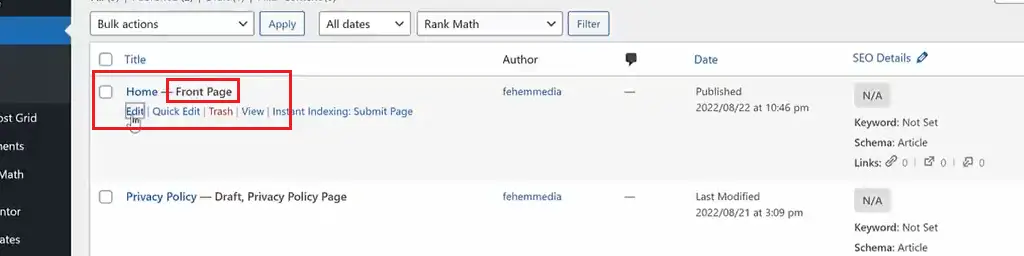
If you come back to pages on your WordPress dashboard you will see that the Home page reads “Front Page” indicating it is the home page now no matter where you click from. Image description below:
NOW TO DESIGN THIS PAGE WE HAVE TO USE ELEMENTO PAGE BUILDER:
Click “Edit with Elemento” at the top page. Image description below:

According to the image below, we will learn how this element works. On the left-hand side, we have different elements we will be using to design by drag-and-drop process.
At the right-hand side is the page on our website which we will be designing. Image description below:

We have to do our design section by section. To add a new section click on the cross-button. Image description below:
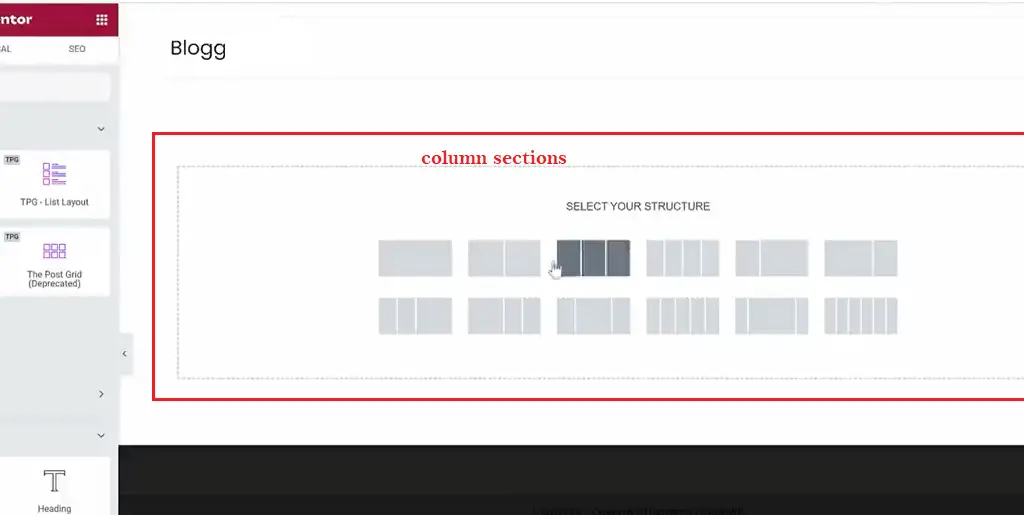
Select how many columns you want. For the purpose of this tutorial, we will be selecting two columns to enable us to design the pattern according to the image below:
To add a new section, click on the cross icon and select two columns to add and start with. Image description below:

By the left-hand side are the functions, you can use to affect the settings of the column selected. We have three core elements with various functions and they are: LAYOUT, STYLE, AND ADVANCED.
To insert text in the first column, click on the nine dotted icons at the top to display all the function elements. Select “Heading” click on it and hold then drag it into the first column. Image description below:
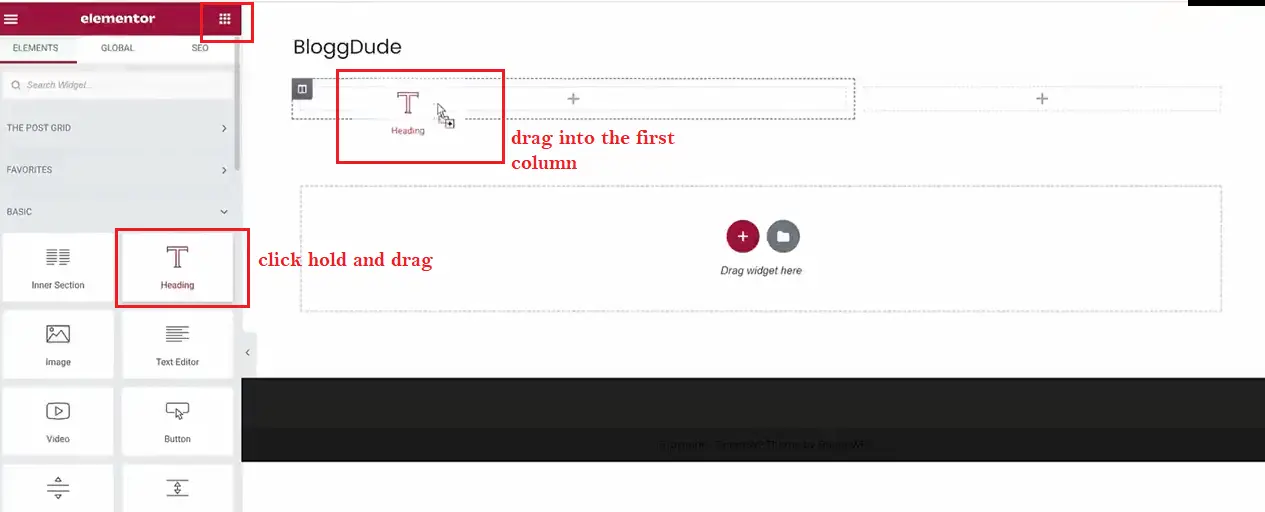
Then type in the title of your website page. Image description below:

To change the color just click on the “STYLE” element to display all the functions responsible for that and start making use of it.
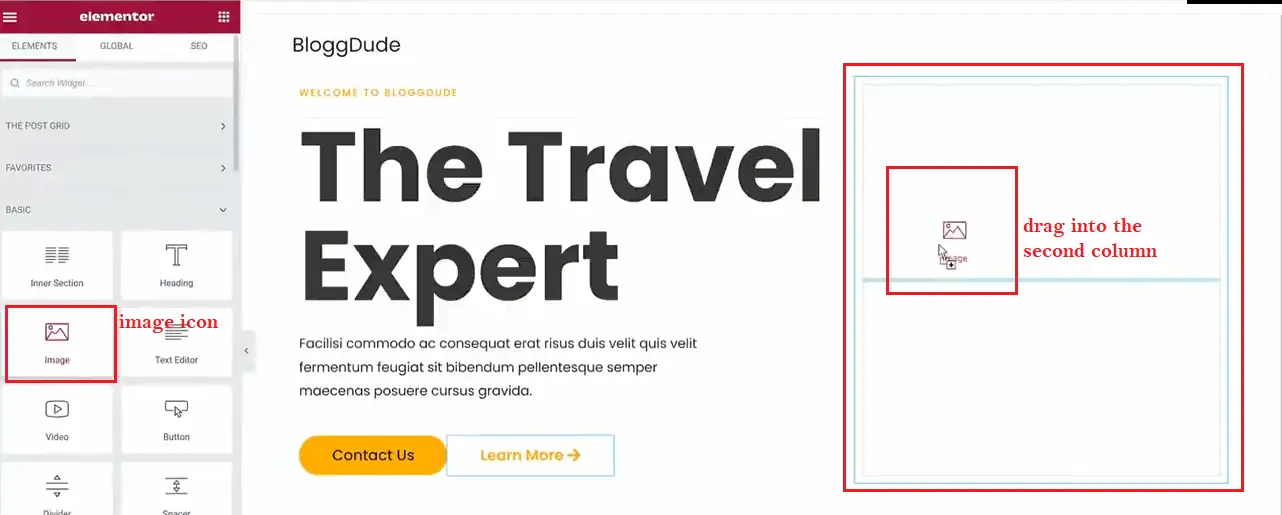
TO ADD IMAGE AT THE SECOND COLUMN:
Go to the left-hand side of the elements select “image icon” and click and hold drag inside the second column. Image description below:
To add your image, go to the left-hand side and click the image sign to upload an image from your computer source file. Image description below:
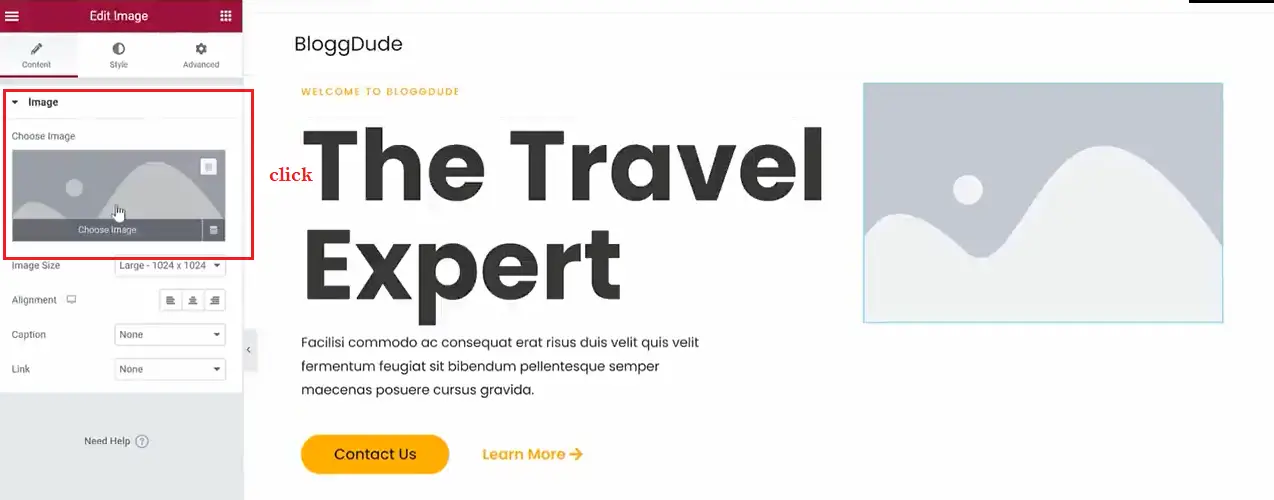
After selecting an image from your computer click on “Insert media” Image description below:

The inserted image should look like something below on the image description:

You can go ahead and design with the function as stipulated on the left-hand side of the function elements.
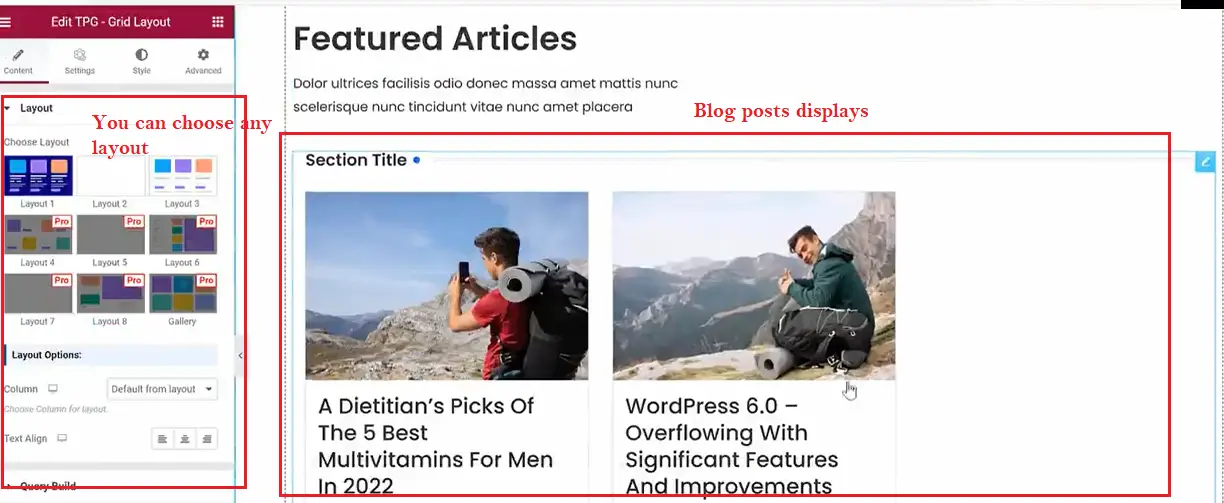
ADDING BLOG SECTION ON YOUR HOME PAGE:
Come back and click on the nine-dotted icon at the top. At the search query, type in “TPG” to display the post-grid layout. This is what we will use to display your blog post on this home page. Image description below:

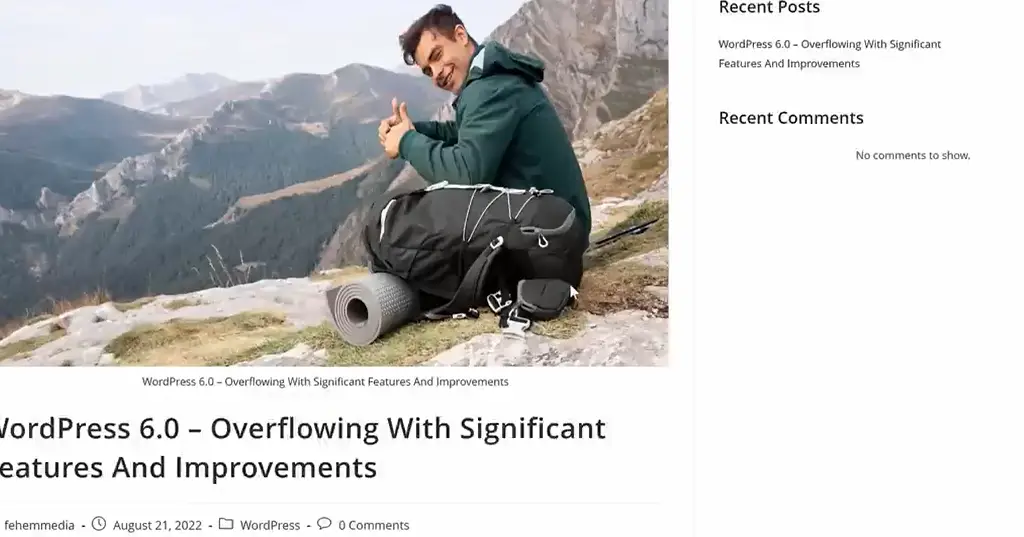
Click, hold, and drag toward the section you’ve added to display the blog posts. Image description below:

The actual blog display looks like the image below:
Then you can go ahead and use the functions on the left side and design it however you want it to be.
5. CREATING WEBSITE MENU:
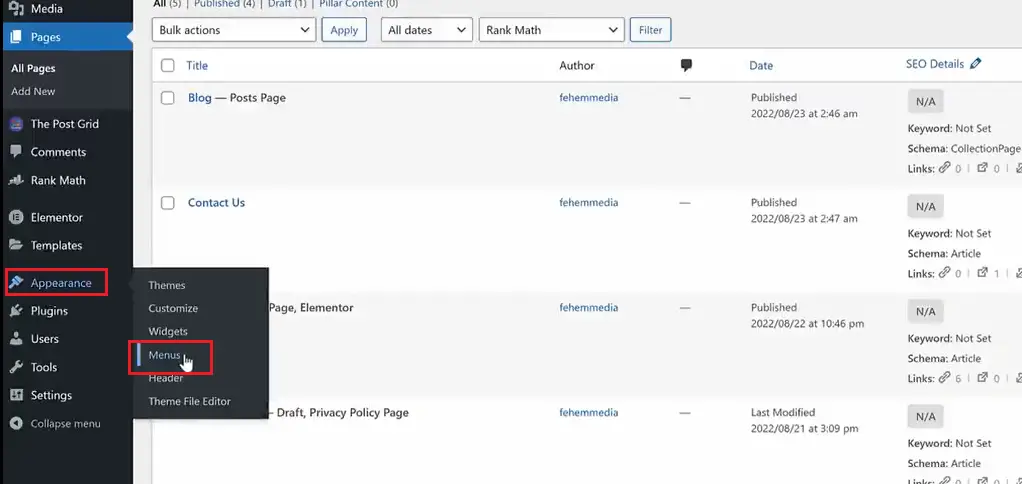
To create a new menu, go to your WordPress Dashboard hover on “Appearance” select “Menu” and click on it to display the menu page. Image description below:
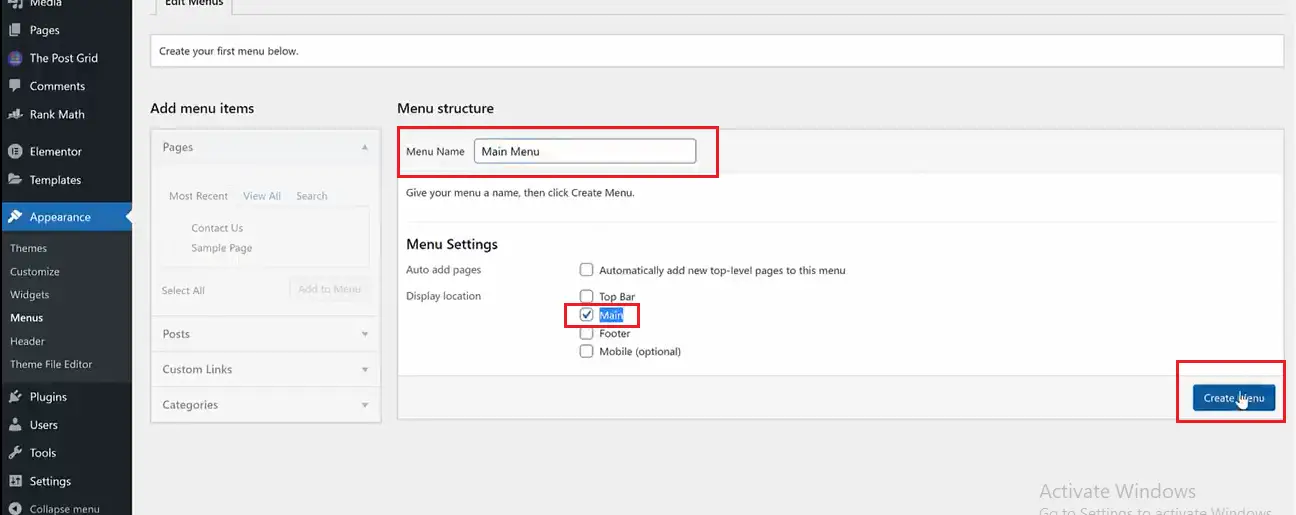
Then name your menu anything you want. For the purpose of this lecture, I will name it the main menu, and at the “menu settings” make sure you tick-mark “Main” and hit the “Create menu” button. Image description below:
After that, at the left-hand side where you see “Add menu items” click on “View all” to see all the elements of the header to add to your menu.
Tick-mark them and click the “Add to menu” button to add them to your menu. Image description below:
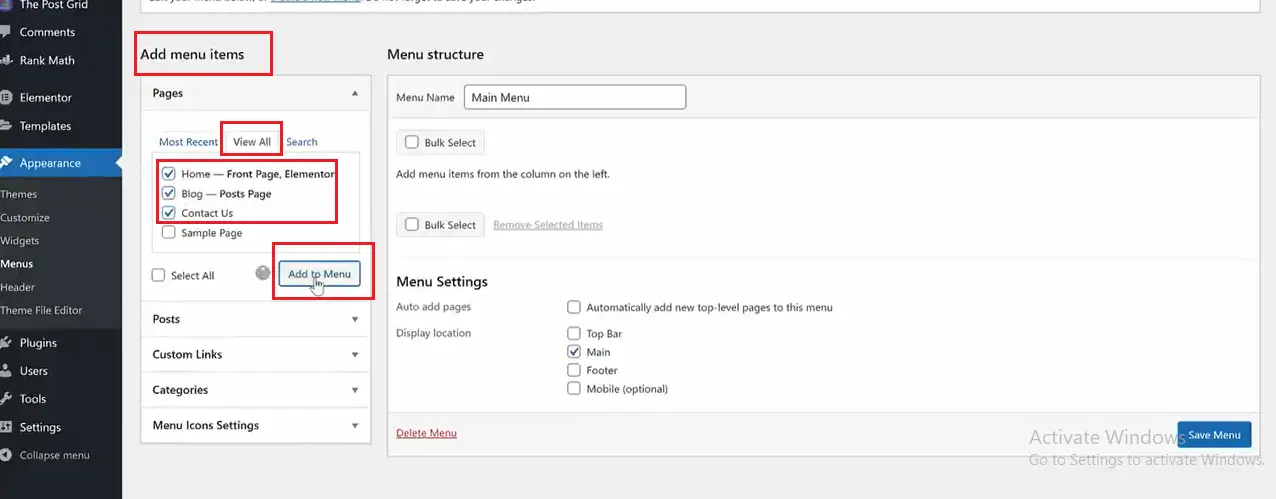
After that click on the “Save menu” button at the bottom right-hand-side.
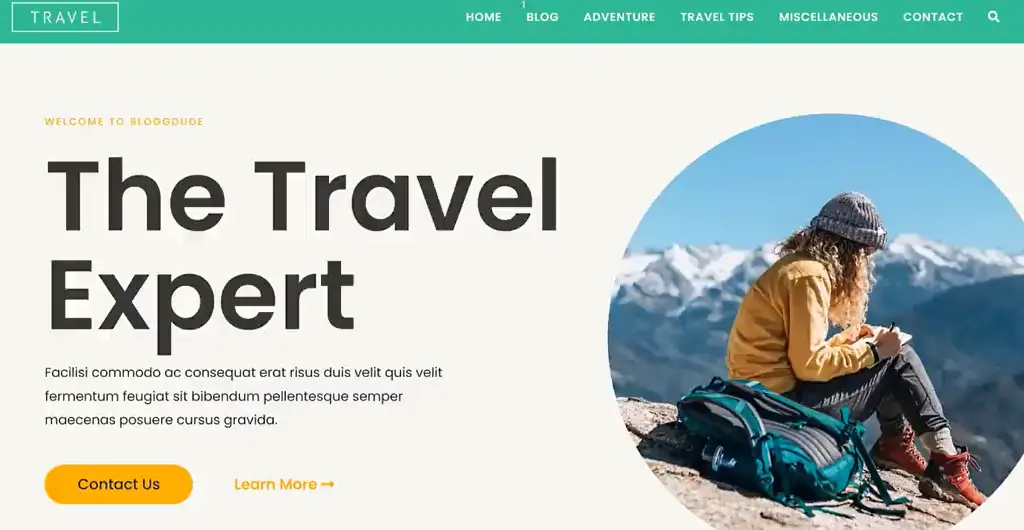
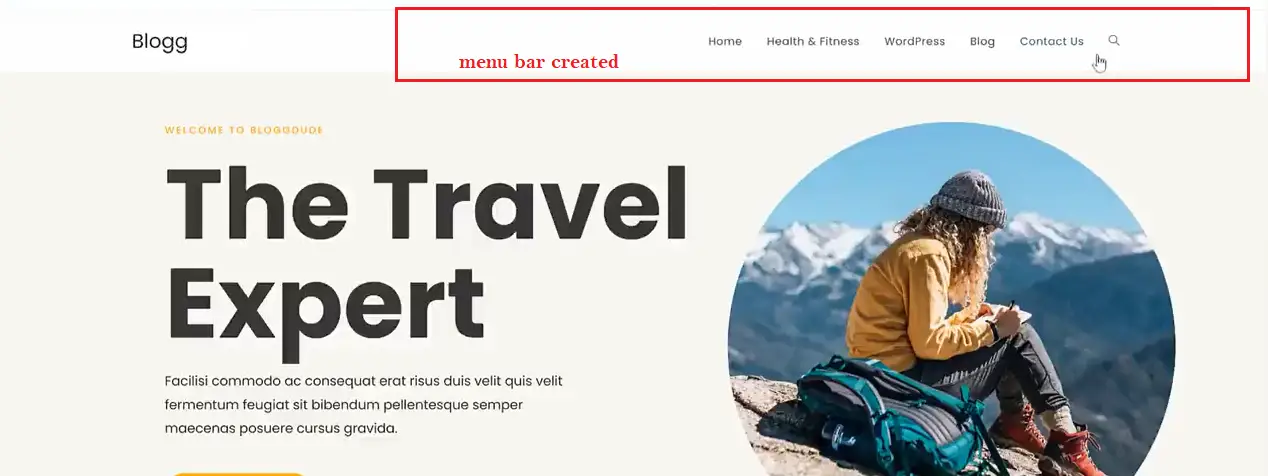
Then refresh your page and you will see something like the image of my own design or your design with the menu created with its elements. Image description below:
6. SETTING UP THE FOOTER:
Within your dashboard, under “Appearance” click on “widgets” click on “footer 1” then click on the cross sign icon search for an image, and add it. Image description below:
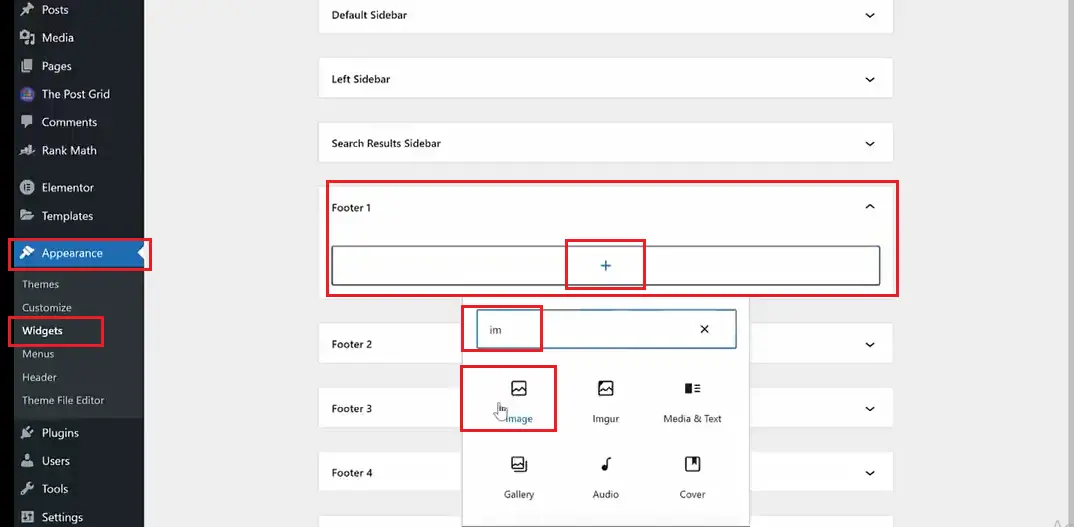
Click on “media library” tick-mark your image to upload and at the bottom right-hand side click the “select” button to add your image logo. Image description below:
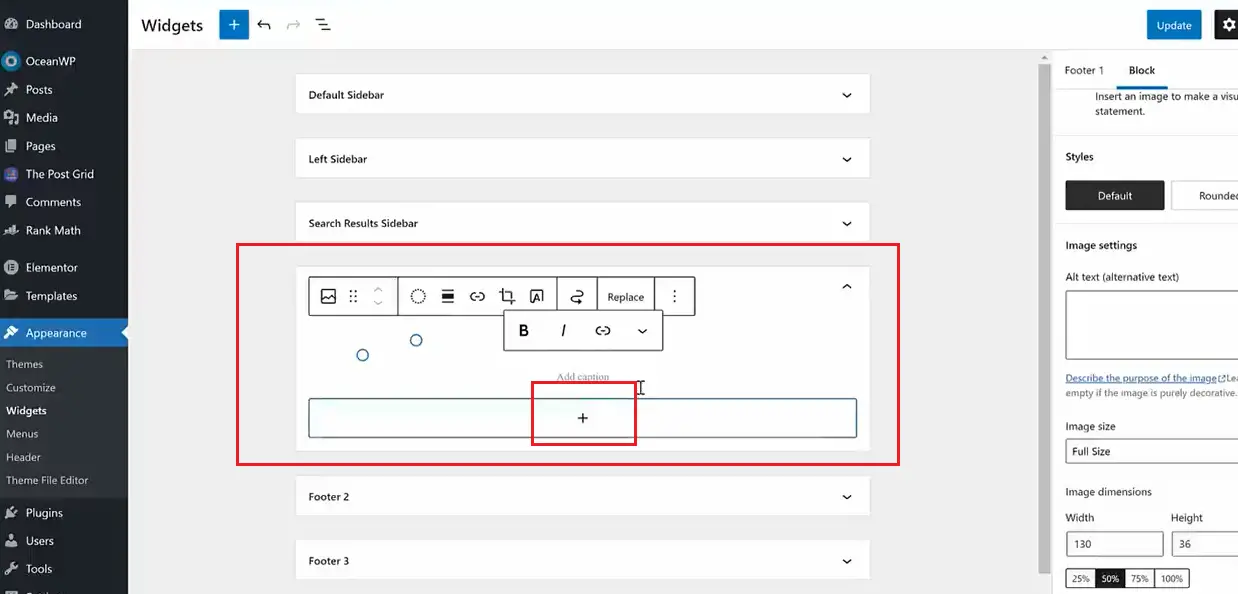
To add text, click on the cross icon select paragraph or heading, and follow the same process to add your text.
7. CONCLUSION:
Thanks for following me till the end of this practical guide. If you have any questions feel free to let me know in the comment section and I will gladly attend to you.
If you follow this procedure and watch some video tutorials, you will be good to go in building and hosting a professionally design blog.
Thanks and remain blessed.
Please, Do not forget to Stay Blogging and never leave.


Good day I am so delighted I found your web site, I really found you by error, while I was searching on Aol for something else, Anyways
I am here now and would just like to say kudos for a fantastic post and a all
round interesting blog (I also love the theme/design), I don’t have time to read through it all at the minute but I have book-marked it and also added in your RSS feeds, so when I have time
I will be back to read a lot more, Please do keep up the fantastic
job. I saw similar here: dobry sklep and also here: ecommerce
Thanks a lot for bookmarking and feed-reading our blog. You are welcome all the time.