I. Introduction:
A. Brief Explanation of Kadence Block:-
This is a group of Gutenberg blocks, and they are content blocks used in WordPress websites.
Kadence Block is an extension plugin for the WordPress Gutenberg editor aimed at enhancing the default block editor’s capabilities by providing additional blocks and features for building and customizing content.
Kadence Block houses a collection of blocks which can be used to create various elements on your WordPress website, such as advanced galleries, sliders, testimonials, accordions, tabs, and more.
And the advancement from Gutenberg is the user-friendly design which is highly customizable and offers more design options.
Having known what Kadence Block is, let us look at the importance of professionally designing your blog page. (Maybe with Kadence Block).
B. Importance of Professionally Designing Your Blog Page:-
A professionally designed blog page influences the overall user experience of your blog so, having a professionally designed blog page is essential for your success as a blogger.
Below are some major reasons for having a professionally designed blog page:
— First Impression Matters:- Remember that the first thing a visitor sees is your blog page when embracing your website. So, a professional and aesthetically pleasing design creates a positive first impression, increasing the likelihood that visitors will stay and explore your content further.
— User Experience (UX):- For visitors to find the information they are seeking, there suppose to be easy navigation, a clear layout, and well-organized content.
And this will help improve their satisfaction with your blog.
— Brand Identity:- Very important to note that your unique style of design will help create a unique notice about who you truly are. Remember that good design elements, such as logos, colours, and typography, help reinforce your brand and make it memorable to your audience.
— Credibility and Trust:- Professionalism will be achieved with high-quality visuals and a polished layout. This will go a long way to make visitors more likely to trust the information you provide.
— Mobile Responsiveness:- With a significant increase in the number of individuals surfing the internet with their mobile phones, a professionally designed blog ensures that your content adapts to various screen sizes, improving accessibility and user experience on all devices.
— Search Engine Optimization (SEO):- Proper design practices, such as fast loading times, clean code, and mobile-friendliness, contribute to better SEO rankings.
— Readability and Engagement:- It will be very easy for users to consume your content with a well-designed blog page.
— Lower Bounce Rate:- With a well-designed blog page you will likely have a lower bounce rate, meaning that visitors will tend to stay on your site longer exploring multiple pages.
— Social Sharing and Backlinks:- High-quality and visually appealing content is more likely to be shared on social media platforms and attract backlinks from other websites.
— Competitive Advantage:- In the crowded online world of today, if your blog stands out with a unique and eye-catching design, more likely that it will attract and retain readers in a highly competitive blogging landscape.
For your information, you have to know that a professionally designed blog page is an investment that pays off with time. And it will pay you in terms of increased traffic, engagement, credibility, and a positive user experience, ultimately contributing to the success of your blog.
Now is the time to know how we can be able to install this Kadence Block from Gutenberg to professionally design our blog page. Let’s begin……
II. Installation of Kadence Block:-

A. Accessing WordPress Dashboard:-
To login into your WordPress Dashboard, open your browser and type the URL of your website as follows: https://mywebsite.com/wp-admin
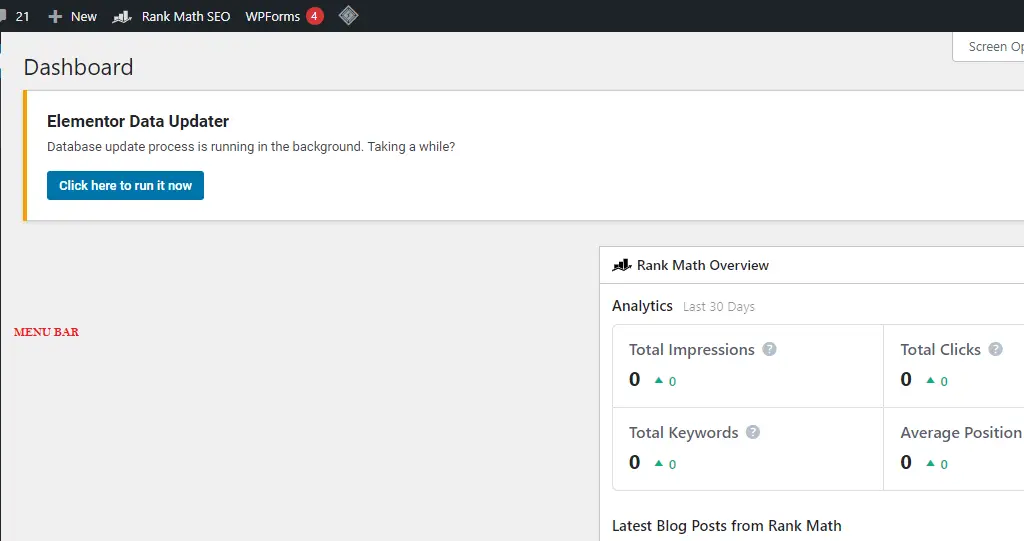
This will take you to a page to enter your username and password and hit the sign-in button to enter into your WordPress dashboard. I hope you should be able to do this by now. And your WordPress dashboard should look like this. Image description below:
B. Navigating to Plugins:-
Let us navigate to plugins to install Kadence Block we needed to create designs.
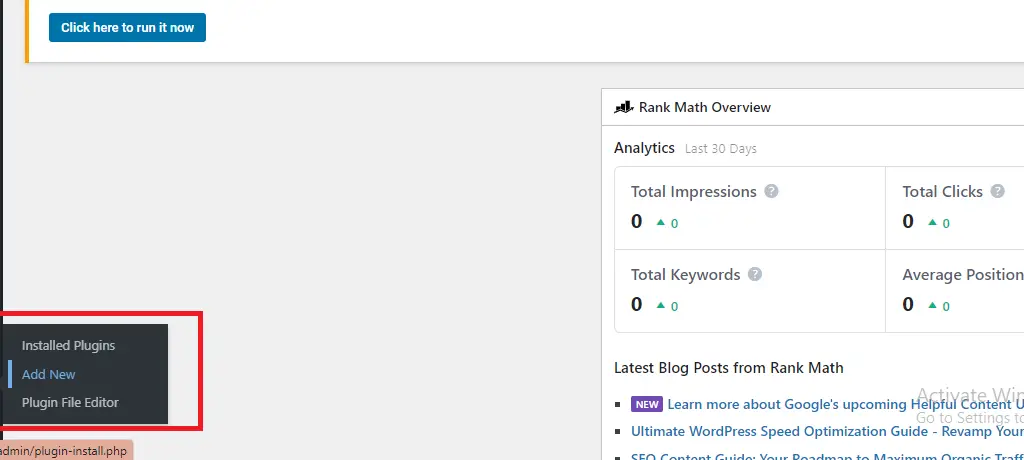
Go to the extreme left-hand side of your WordPress dashboard and locate “Plugins” Hover your mouse cursor on it and locate “Add New” to add new plugins. Image description below:
You will be taken to the plugin directory of your WordPress dashboard. Go to the extreme right-hand side and locate the search form and type in “Kadence Block”, click on it to install the plugin. Image description below:

Please remember to click “Activate” to equally activate the plugin. This is how to install and activate any plugin from your WordPress Dashboard. This block will help you to design your blog page with sample blocks as shown below in the image description:

III. Getting Started with Kadence Block:-

Now, we are going to start designing our blog post page with Kadence Block for Gutenberg. Let us start…
A. Creating a New Blog Post/Page:-
To create a new blog post/page, log into your WordPress Dashboard, at the left-hand side menu bar locate “Posts” and hover on it with your mouse cursor to display the sub-menu.
Then click on “Add New” to enter the page where you will type your blog post title and body.
Image description below:

Open your Word document where you’ve typed all the content you want to post in your blog. Copy the Title heading and paste it. Then start copying the body paragraph by paragraph and past as well.
To step down to the next paragraph press “Enter key” on your computer keyboard to do so. Image description below:

You can create the Table of Content of your post either at the beginning of the Post Body or middle. And to do just that, click within the paragraph section and locate the “cross share sign” Click on it to display a menu of items and in the search form type in “table of content” and locate the table of content, click it to insert the Table. Image description below:

According to the image below, this is the table section.
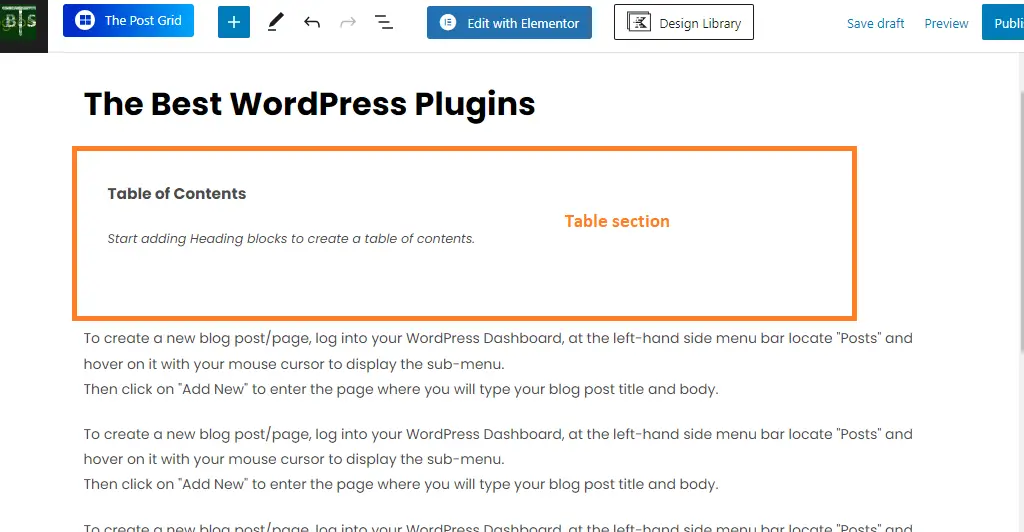
Click inside the table section to highlight it,

and press the “Enter button” on your computer keyboard to step down to the next paragraph making it possible for the table to appear.
And to create a heading, click on the “cross share icon” to select a sub-menus of items. As usual, within the search form enter “heading” and select it among the submenus that appeared.
Click on it to add the heading. Image description below:

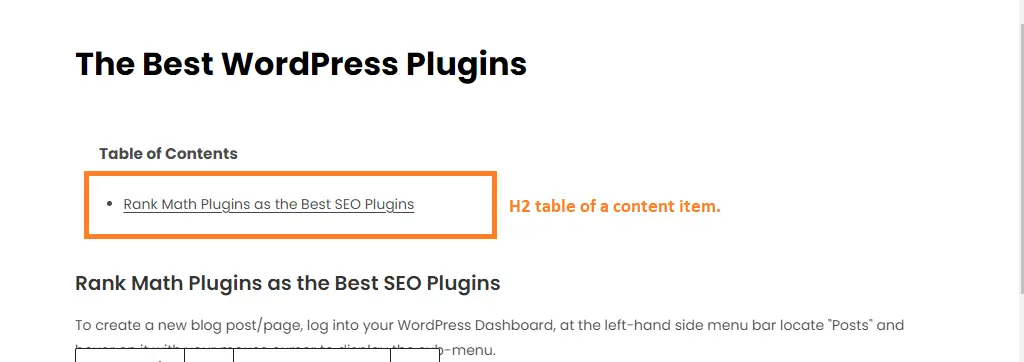
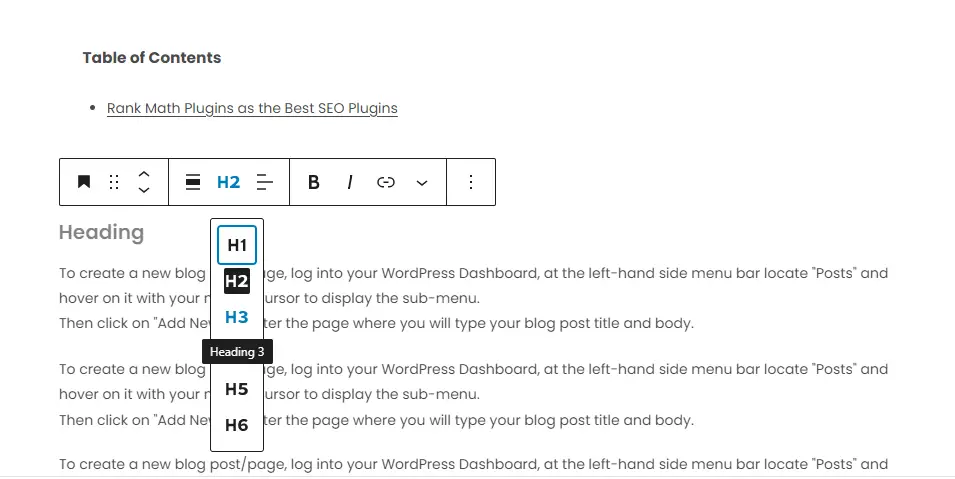
Copy the table header you want from your Word document “Example: Rank Math Plugins as the Best SEO Plugins.”
Paste it within the “heading form” as indicated in the image above. Then press “Enter” on your computer keyboard. The sentence automatically becomes a Table of Contents heading with (H2). Image description below:
To select other heading options click on the (H2) and you will see other Table of Contents heading values. Image description below:
IV. Designing Your Blog Page:-
Now we have come to the actual work of designing your blog page with Kadence Blocks. Let’s assume we want to incorporate affiliate products, you can’t just add the links casually like that. You have to make it eye-catching and appealing.
And also embedding price tags for products.
Let’s use price tag embedding to learn as an example.
a). Adding Price Tags:-
To do so, step down and select a paragraph within your body content. Locate the “cross share icon” and click on it to display the sub-menus and the form search then enter “row layout.” Image description below:
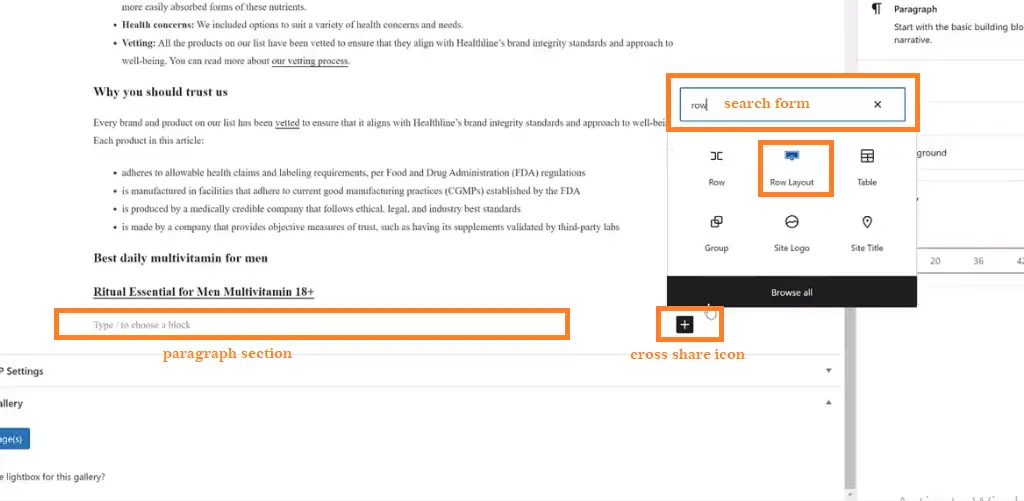
The Kadence Block plugin is the one making it possible for us to be able to create these row layouts, Tables of Content, and other template formats.
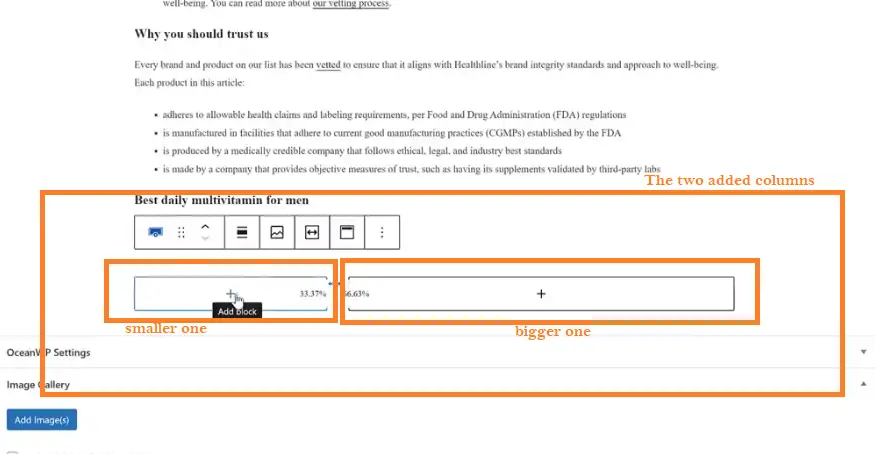
This will display various column formats for you. And we want two columns one smaller than the other to enable us to design the kind of price tag we want. Image description below:
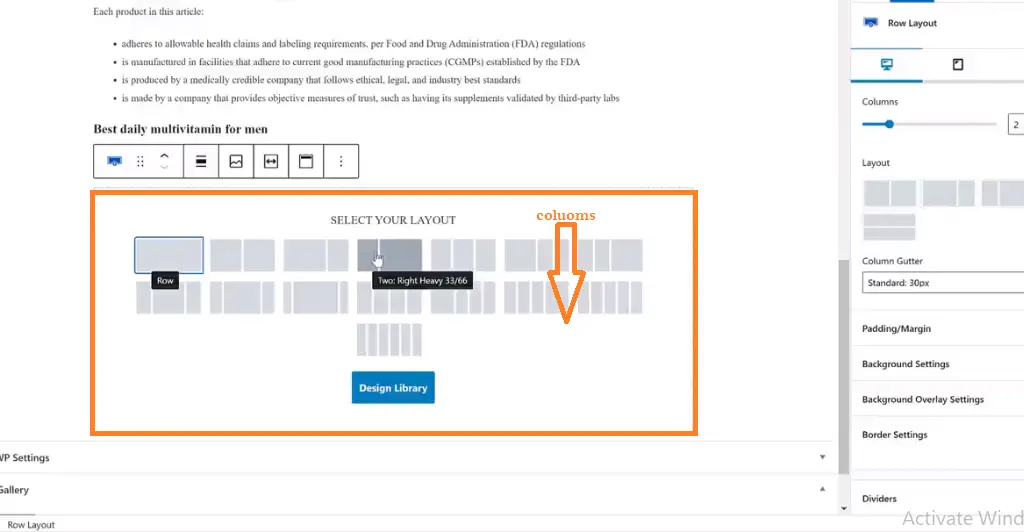
Then we will select the number of required columns to add to our blog page. Image description of the two added columns below:
To add anything either a letter or image within the column boxes, place your mouse cursor on the “cross share icon” and click to display menus of items as usual. We will be adding an image then select “image icon”, image description below:

Click on the “image sign” select “upload” then click on “select files” to upload the required image from your computer directory. Image description below:

After choosing the image you required click on “Select” at the extreme right-hand side. The image will be added to the required column box. Image description below:

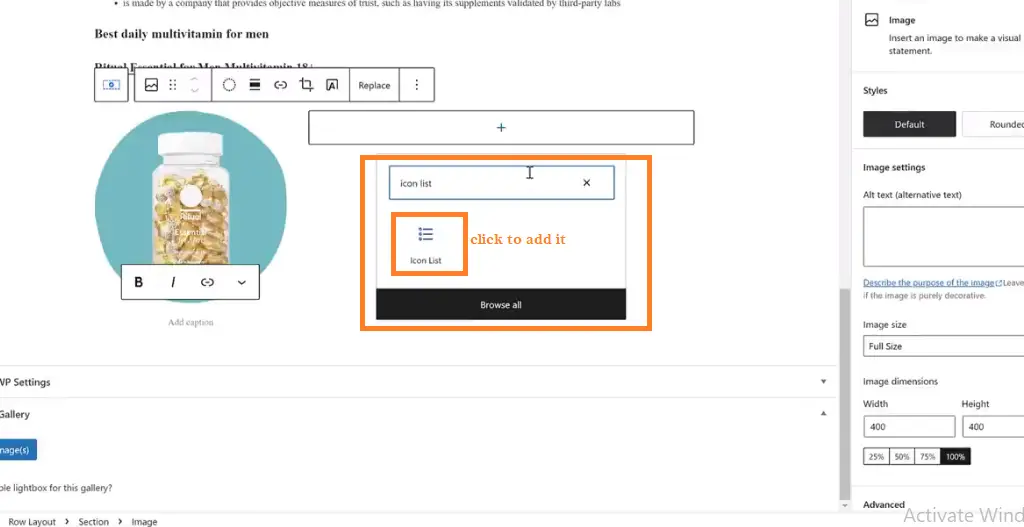
At the right-hand side of the being designed column we have to add a list of items, for this, we have to use a bulleted list. To do that click on the “cross share” within the bigger column box, and search for “icon list” within the search form just like we did before with the image.
And add it by clicking on the icon list. Image description below:
According to the image below, by default, the icon ticked with good will be present but you can change the icon to any symbol you want. Image description below:
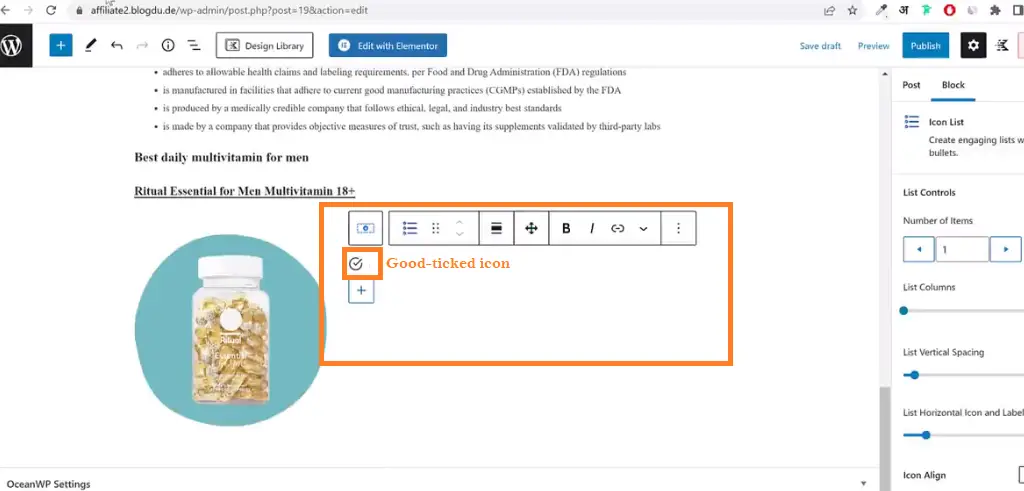
Start adding the list items and after that, the structure will look like the image below:

Then let us go ahead to give it further design as supposed.
First, let’s change the icon. Click within the bigger column box for the icon list and go to the right-hand side, there are two options at the top, the POST and BLOCK options, click on the “Block Option” and scroll down and you will see “Edit All Icon Styles Together” click on it.
Image description below:

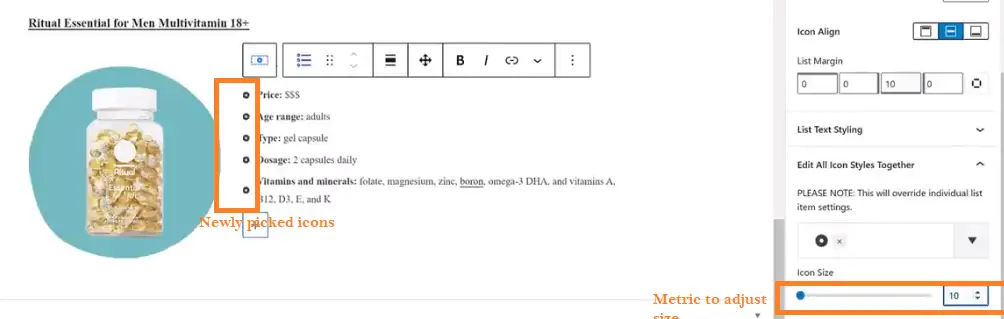
Below the highlighted box you will see the icon symbol you already added and the sign of X (indicating delete) beside it. Click on the sign to delete the already existing icons.
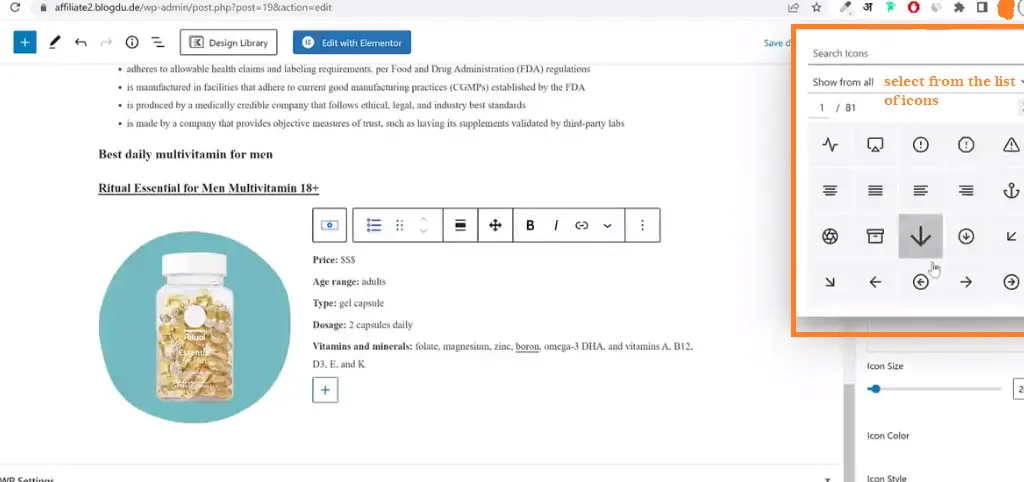
Then click on the options menu to select from the list of icons. Image description below:

Select the particular icon you want from the numerous list of icons. Image description below:
You can decrease the size of the icons by using the size metric below the icon lists displayed. After picking and adding your required icon, the design will look like this image below:
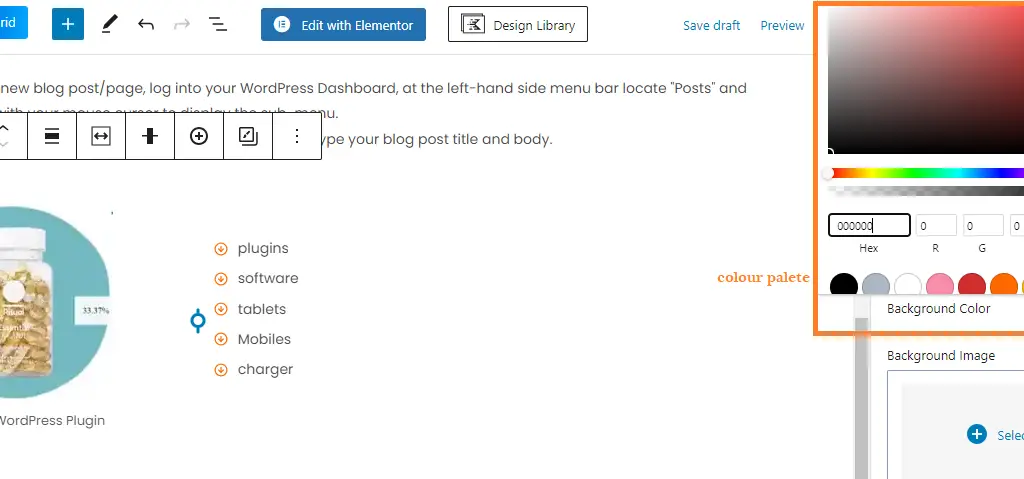
To change the colour of the icons, scroll down and you will see the “icon colour” Click on it and pick the colour you required from the colour palette. Image description below:

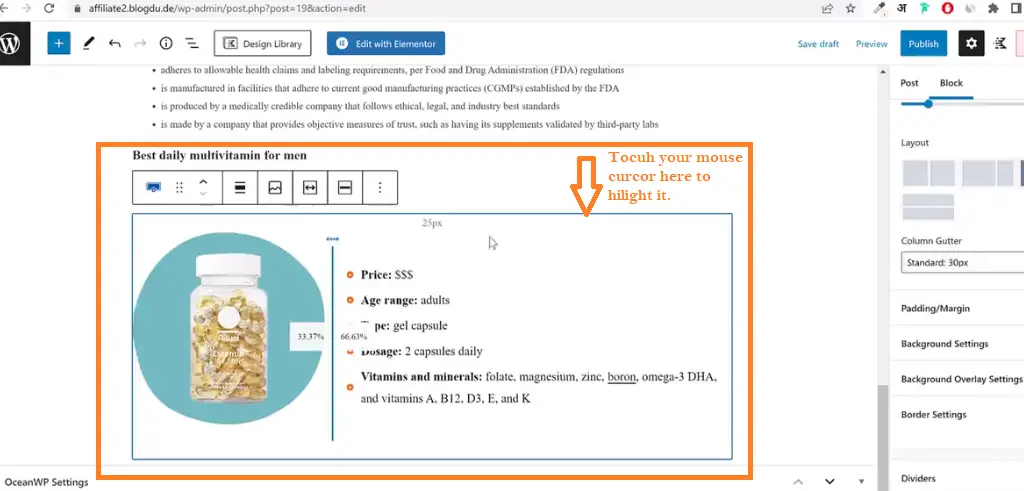
The good thing about this Kadence Block design is that you can save the already designed section and be able to re-use it again. To save this section for re-usual, just place your mouse cursor on the periphery of the section to highlight it. Image description below:
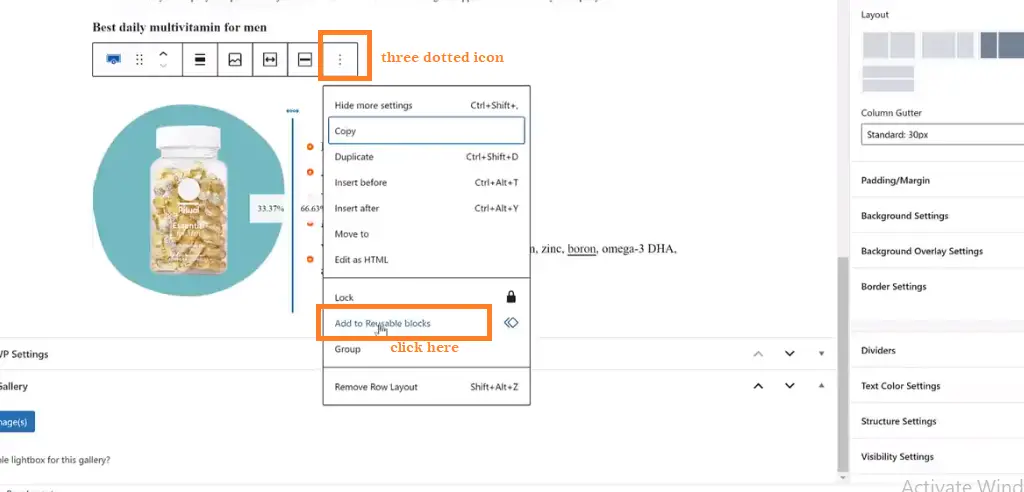
Click on the three-dotted icon at the end of the list of functions above, and select “add to reusable blocks.” Image description below:
Then a pop-up form will appear indicating you should name the reusable block. Give it a name of your choice and click “save” Image description below:

To add background colour to the whole section for more designs, place your mouse cursor on the periphery of the section to highlight it.
Image description below:
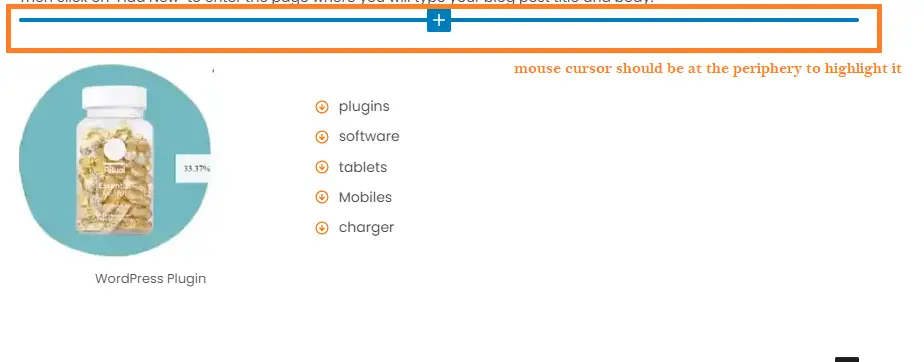
Click on the periphery to do the highlighting process. and the image will look like below:

Go to the extreme right-hand side and select “style” menu options. Click on “background colour” to select any colour you want from the colour palette.
Image description below:
After picking the colour of your choice the whole design will look like the image below:

This is how those designs you do see on professional blogs are gotten. You can design your blog page with Kadence Blocks not minding the items you want to enclose on the section.
You can add buttons and hyperlink them, just follow the procedure and search for any icon you want to make use of within the search form as we did.
Mostly affiliate items, lists of items, special outlines and more can be designed in this format to make it look professional within your blog page.
V. Conclusion:
A. Recap of benefits of using Kadence Block:-
Kadence Blocks is a plugin for the WordPress content management system (CMS) that provides enhanced block options and functionalities for the new WordPress block editor, known as Gutenberg.
Below are some benefits of using Kadence Blocks:
— Enhanced Design Options: Kadence Blocks offers a range of design and styling options that go beyond the default Gutenberg blocks. This includes advanced settings for margins, padding, borders, backgrounds, and typography.
— Responsive Controls: The plugin provides responsive design controls, allowing you to customize how your content looks on different devices or screen sizes.
— Global Styles: Kadence Blocks allows you to create and apply global styles, ensuring a consistent design across multiple blocks or even across your entire website.
— Row and Column Layouts: The plugin introduces row and column blocks that make it easier to create complex layouts without resorting to custom code.
— Advanced Buttons and Headlines: Kadence Blocks offers improved button and headline blocks with more customization options, allowing you to create attention-grabbing call-to-action elements and headings.
— Form Integration: The plugin includes a Form block that facilitates the creation of simple forms within the WordPress block editor.
— Pre-Built Starter Templates: The plugin comes with a variety of pre-designed block templates that you can use as starting points for your content.
Now, here are a few encouragement for you as a blogger to explore and unleash creativity in your blog design.
B. Encouragement to Explore and Unleash Creativity in Blog Design:-
— Embrace Your Unique Perspective: Your blog is a canvas for your thoughts, ideas, and creativity. Embrace your unique perspective and let it shine through your design choices.
— Experiment and Play: Blog design is not about following strict rules; it’s about experimenting and playing with different elements.
— Tell Your Story: Use your blog’s design to tell your story visually by incorporating images, graphics, interest and even personal journey.
— Look beyond the blogging world for ideas—art, nature, architecture, fashion, and more.
— Mix and Match: Mix and match different design elements to create something entirely your own. Avoid limiting yourself.
— Ensure that your design choices enhance readability, navigation, and accessibility for your readers.
— As you gain insights from your audience, you can make adjustments that enhance the overall experience.
— Take breaks, step away from your work, and recharge. Sometimes, your best ideas come when you least expect them.
— Celebrate Small Wins: Celebrate every creative breakthrough, no matter how small.
— Trust Yourself: Trust your instincts and believe in your ability to create something truly exceptional.
Remember, blog design is not just about aesthetics—equally, it is a reflection of your personality and a way to connect with your audience. Always try to go ahead and explore, never forget to experiment, and let your creativity flow as you design a blog that’s authentically yours.
Thanks and remain blessed.
Please, Do not forget to Stay Blogging and never leave.


My partner and I stumbled over here from a different web page and thought I
might check things out. I like what I see so i am just
following you. Look forward to looking over your web page for a second time.
I saw similar here: e-commerce and also here: e-commerce